How To Use Meta Business Suite | Complete Meta Business Suite Guide
.png)
Meta Business Suite is an all-in-one platform (mobile app and website) that enables you to manage daily business activities on Facebook, Messenger, and Instagram.
By learning how to use Meta Business Suite in 2022, you’ll no longer need to navigate back and forth between these individual apps and channels.
The Meta business suite allows you to create ads, manage your inbox, respond to comments, schedule and post content, and more from one single platform.
Read more: How To Use Facebook Business Suite App
How to Use Meta Business Suite?
In this Meta Business Suite tutorial, we’ll teach you how to effectively utilize this powerful tool and grow your business.
1. Get Started with Meta Business Suite
- Visit your browser
- Type in business.facebook.com
However, you do need to create a business manager first.
We’ve created a dedicated tutorial on how to set up Facebook Business Manager if you need help.
In the future, the Facebook Business Manager will merge with the Meta Business Suite.
Therefore, the Meta Business Suite will become the single point of access for everything.
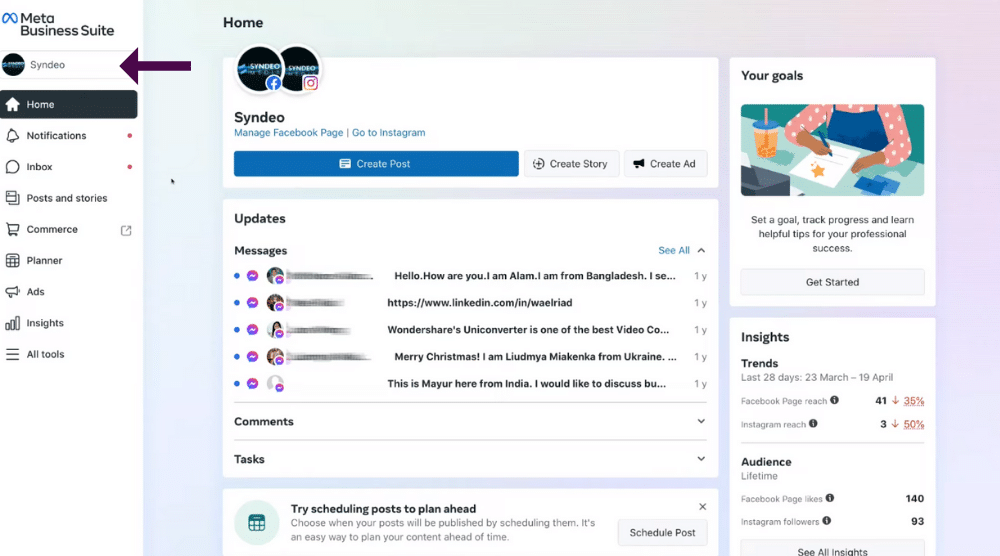
Once you arrive inside your Meta Business Suite, ensure that your business account is selected (see top-left corner).
If you don’t see the business account, follow these steps:
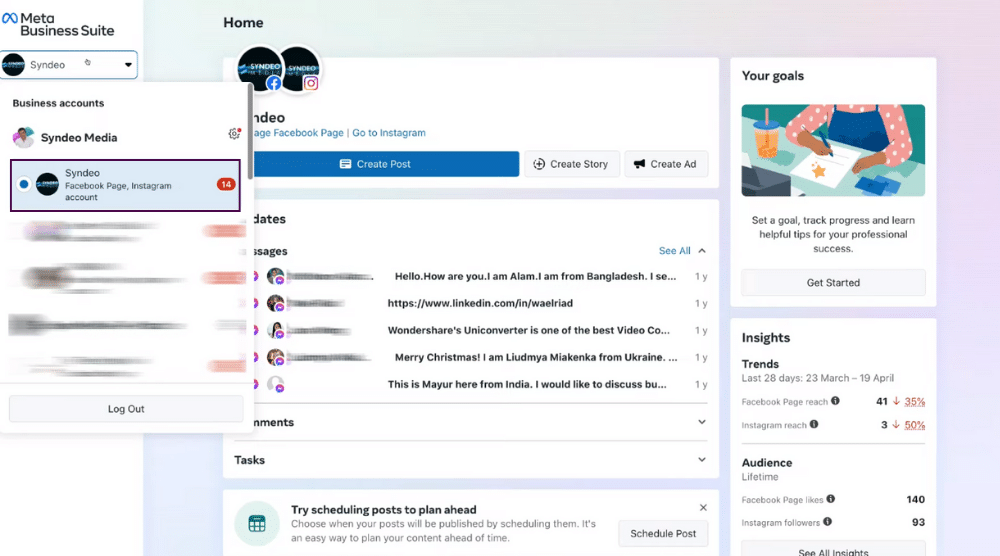
- Click on the account
- Select the business account from the drop-down
It’s that simple!
It should be the same account that you’ve also connected with on Instagram.
If you check the top of the page, you should notice both Facebook and Instagram accounts below ‘Home’ (refer to the screengrab).
- If you currently don’t have a Facebook Business Page, we recommend watching this tutorial.
- To link your Facebook Business Page with your Instagram account, watch this separate beginner’s tutorial.
Once you’ve done that, you can move ahead with this Meta Business Suite tutorial.
Note: You can also install the Meta Business Suite app on mobile. We cover the app in another in-depth tutorial.
Next, we’ll introduce you to all the essential features of the Meta Business Suite.
Read more: How To Create a Facebook Business Page
Read more: How to Connect Facebook to Instagram
2. Create Posts (FB & IG)
Creating posts for both your Instagram account and Facebook Business Page is one of the most common reasons why you’d use the Meta Business Suite almost every day.
To do that:
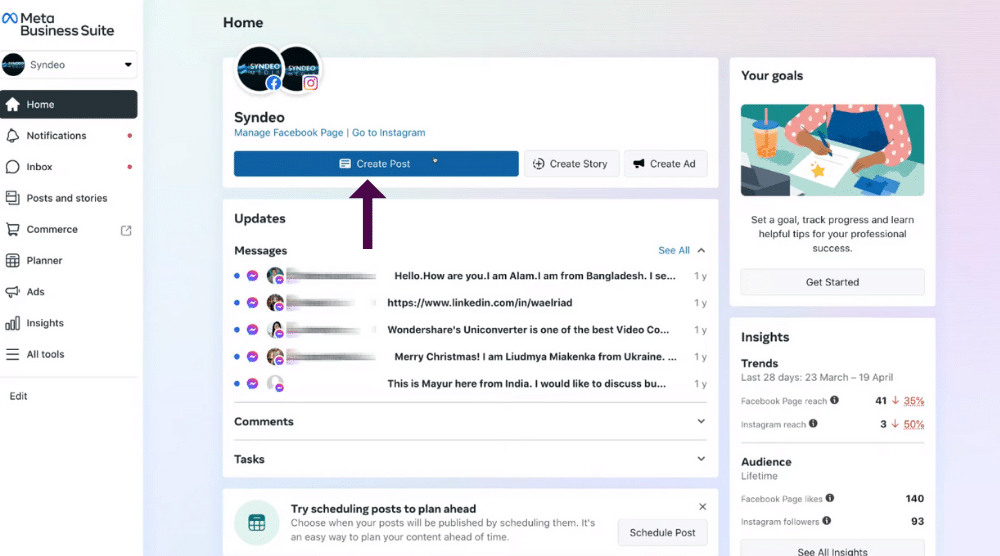
- Select ‘Create Post’ on the homepage. You can also create a story or an ad (more on that later)
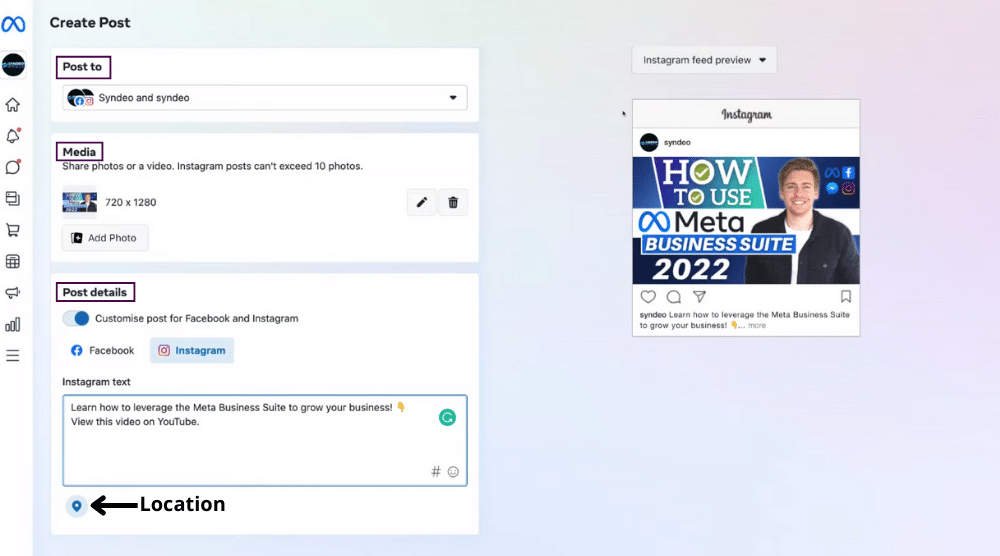
- Hover your cursor over to ‘Post to’ and click on the drop-down
- Choose if you want to publish the post on either of the two platforms or both of them. For this Meta Business Suite tutorial, we’ll select both.
- Upload videos and/or photos to your post under ‘Media’. Remember that you can’t upload more than 10 photos because of Instagram.
- By clicking the pencil icon, you can edit the media or remove them by hitting the bin icon.
- Notice the post’s preview on your right. By tapping on the dropdown, you can see the preview on both Facebook News Feed and Instagram feed.
- Add text content under ‘Post details’
- By clicking the toggle under ‘Post details’, you can customize the post for both platforms. Refer to the screengrab. For instance, since Instagram doesn’t allow links, you can delete the link under post details but keep it for Facebook.
- Add location if you like.
- Hit ‘Publish’ (bottom-right corner) if you’re satisfied with the new post.
You can also save the post as a draft or schedule it.
Hit the drop-down next to ‘Publish’ to view these options.
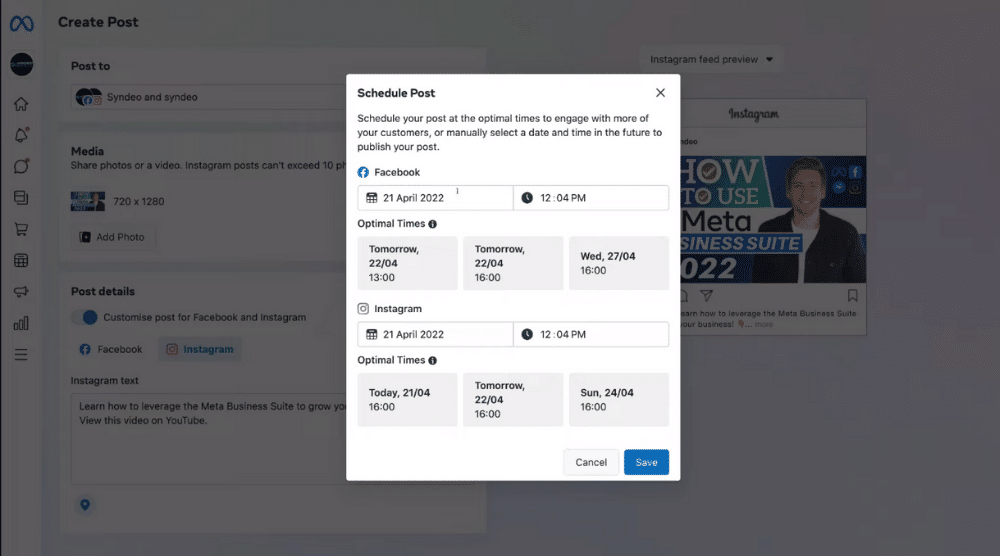
Determine the ideal time when your audience is most active and publish it then.
Manually add a date and time of publishing and hit ‘Save’.
Note that the publishing time can be different for Facebook and Instagram.
Once you’ve fed the scheduling details and saved them, select ‘Schedule Post’ (bottom-right corner) to complete the process.
You’ll now arrive at the Meta Business Suite planner.
Read more: How To Add Admin to Facebook Page
3. View the Planner (Content Calendar)
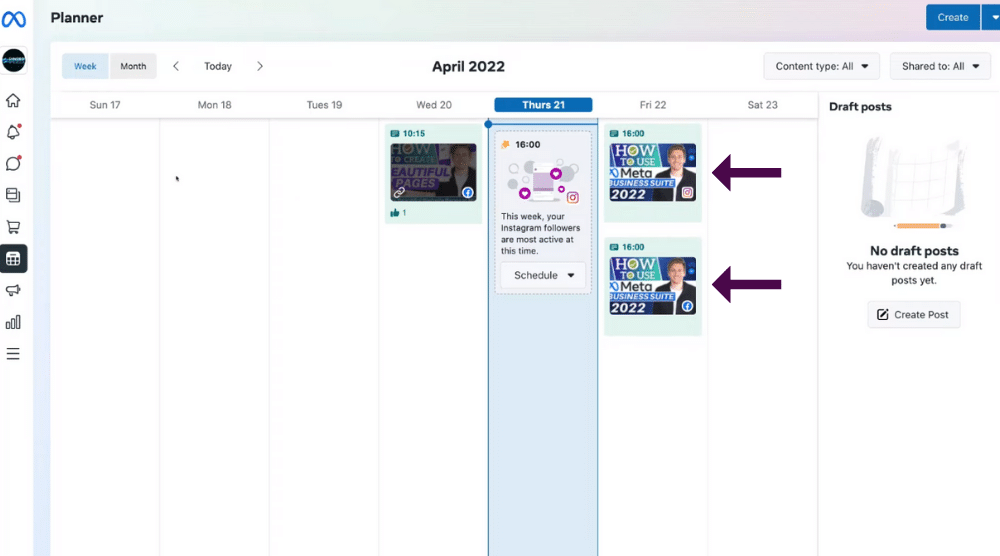
The Meta Business Suite planner is the content calendar where you can view your scheduled and published posts.
You can click on each post to view related details and also preview them.
Apart from that, you also have the option to select ‘Publish Now’.
You can now head back to your Meta Business Suite homepage.
Let’s explore the other features offered by the platform!
Read more: How to Create and Grow an Engaged Facebook Group
4. Explore the Home Dashboard
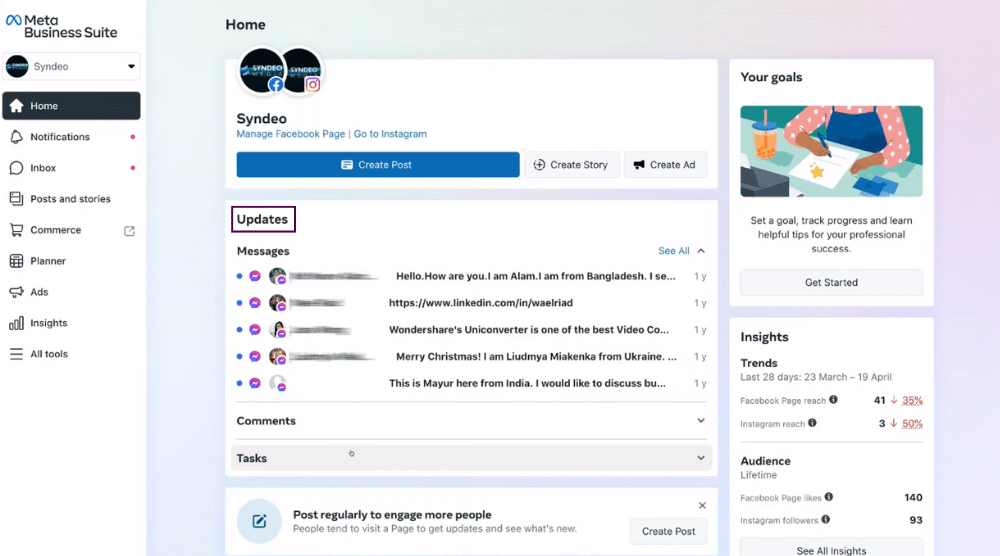
- Under ‘Updates’ is where you can view messages from Messenger, Facebook Business Page, and Instagram.
- Below ‘Updates’ we have comments and tasks.
- Scroll down to view recent posts and stories
- Notice the basic analytics regarding the posts’ performance. Those include comments, reactions, and people reached.
- Under ‘Recent stories’, you can also create new stories for Facebook and Instagram
- Scroll down to view recent ads
- Under ‘Grow your audience’, you can invite friends to like your page
- To view stories from similar businesses, navigate over to ‘Content inspiration’. It would help you generate new ideas for your business. There is another ‘Create Story’ button below it.
Read more: How to Add Facebook Messenger Chat to WordPress
5. View Notifications

You’ll find notifications below ‘Home’ in the top-left corner.
This is where you’ll see all the notifications concerning Messenger, Facebook Business Page, and Instagram.
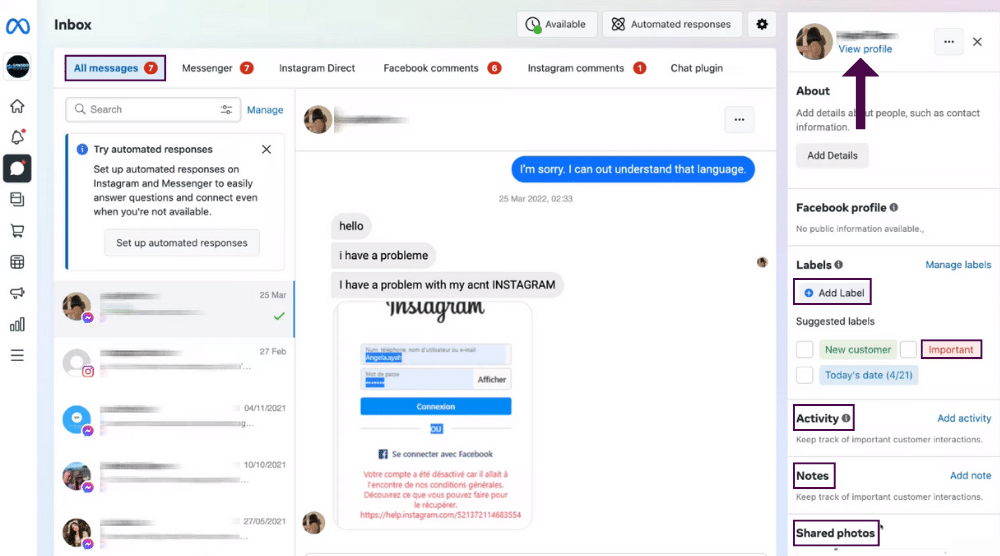
6. Visit the Inbox (Messages & Comments)
We will now go to the inbox in this Meta Business Suite tutorial.
- Below notifications, we have the inbox.
- Notice that ‘All messages’ is selected by default. This is where you can see the comments and messages from Instagram, Messenger, and Facebook Business Page.
- You can filter the messages and comments on these different platforms. The options are next to ‘All messages’.
- Notice that there is a separate tab for ‘Chat plugin’ if there is one installed on your website.
- On the far-right-hand side, you can see more information about the profiles that have contacted you. For each of these profiles, you can add labels, important activities, and notes (see right-hand side).
- Below that, we have the ‘Shared photos’ section. These are the photos added to the chat by people reaching out to you.
7. Set Up Automated Responses
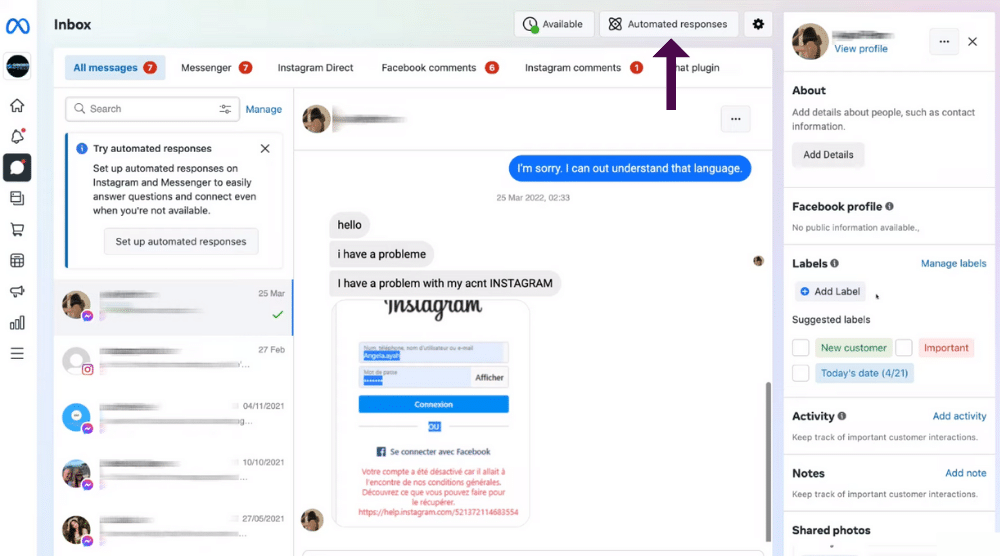
Next to the gear icon on the top, we have the ‘Automated responses’ button.
Click on it.
As the name suggests, this is where you can initiate automated responses for all the platforms managed within Meta Business Suite.
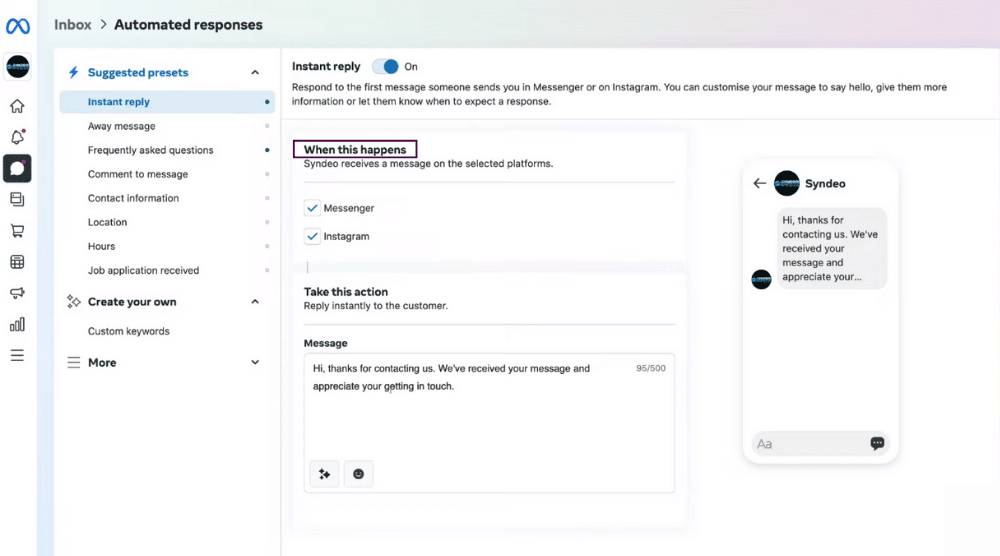
- Under ‘When this happens’, you can choose the platforms (Messenger, Instagram, or both) for which you wish to activate automated responses.
- You can customize the automated response in the ‘Message’ field.
8. Manage Posts & Stories
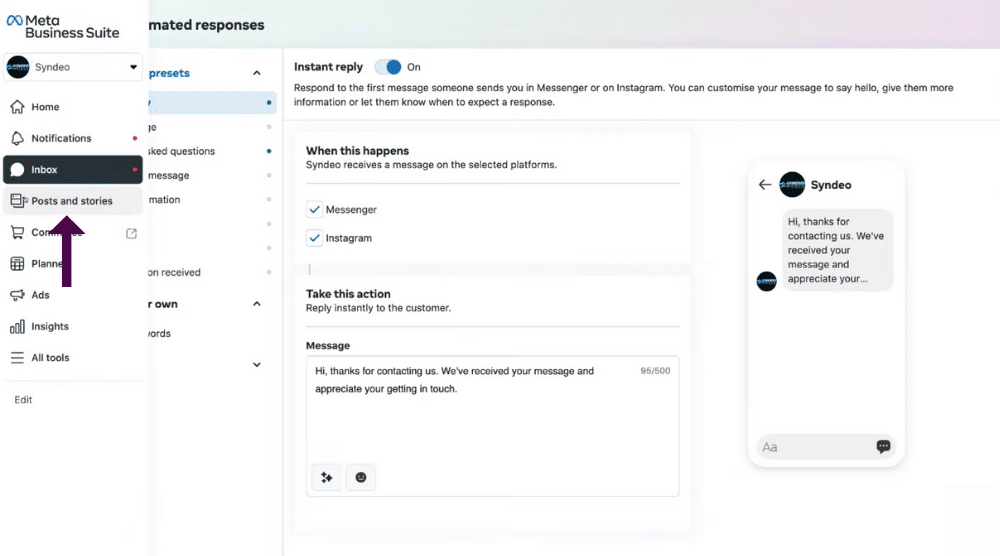
- Point your cursor to the left-hand-side menu
- Select ‘Posts and stories’ below ‘Inbox’

It’s similar to what we explained for the homepage in this Meta Business Suite tutorial.
What you see in the screengrab is an extended version of it.
Here, you can manage all your posts and stories.
- At the top, you’ll find the ‘Create Ad’ button.
- In the upper-right corner, you’ll notice the ‘Create Story’ and ‘Create Post’ buttons.
However, you won’t be using the Meta Business Suite for desktop to create stories.
You’ll need to access the Meta Business Suite app for that purpose.
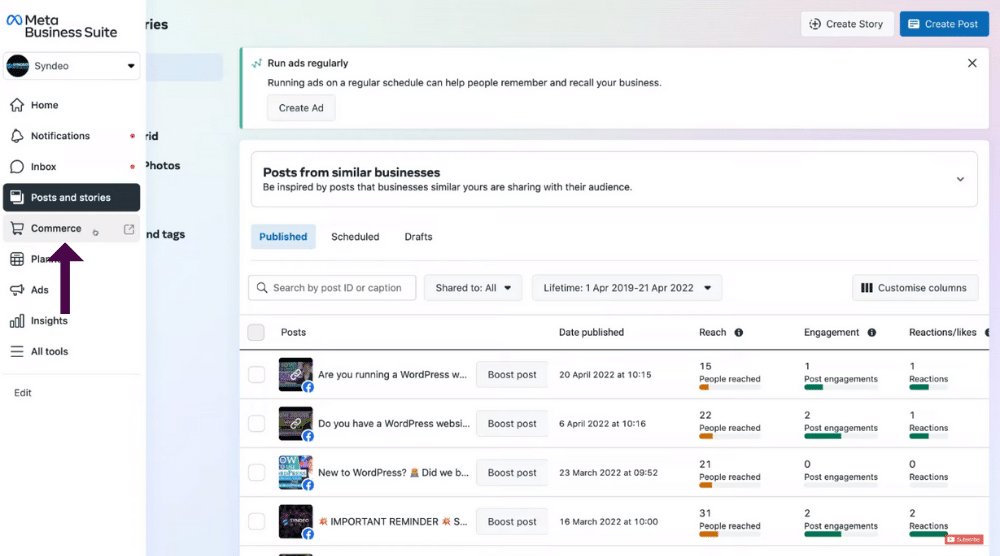

- Hover over to the menu again
- Select ‘Commerce’ below ‘Posts and stories’ this time
This action will take you to the business manager where you can manage your shop.
If you’re not familiar with it, a Facebook shop is a place that allows you to list your products.
People can purchase these products through Facebook shop and Instagram shops.
We’re not going to cover the commerce manager in too much detail in this Meta Business Suite tutorial.
However, if you’re interested in learning more about it, we advise watching this tutorial.
It explains how to create Instagram and Facebook shops.
Below ‘Commerce’, we have the planner that we’ve already covered in this tutorial.
10. Create Ads
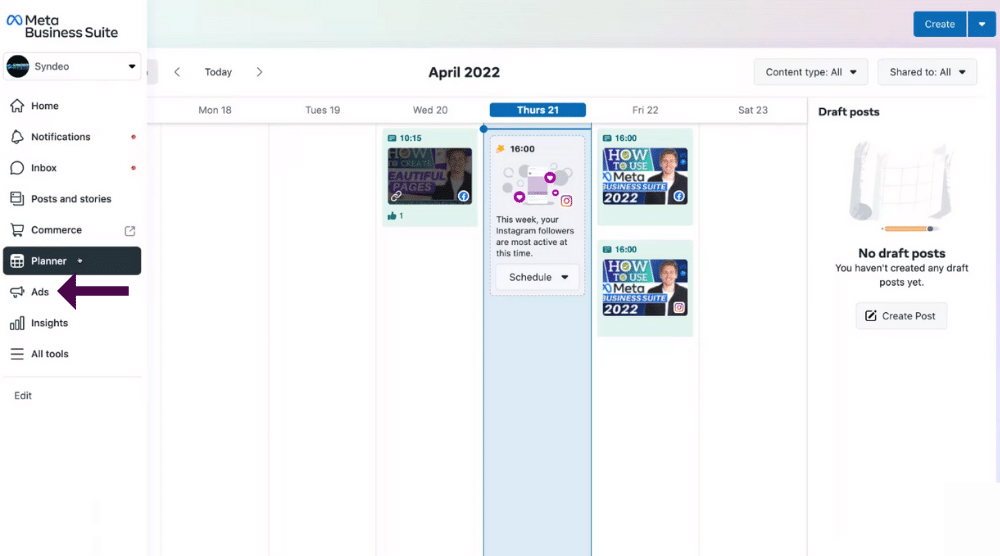
Select ‘Ads’ available below ‘Planner’ on the menu.
Using the boost feature, you can quickly create ads in this section.
This is ideal for beginners who haven’t yet run ads on Instagram and Facebook.
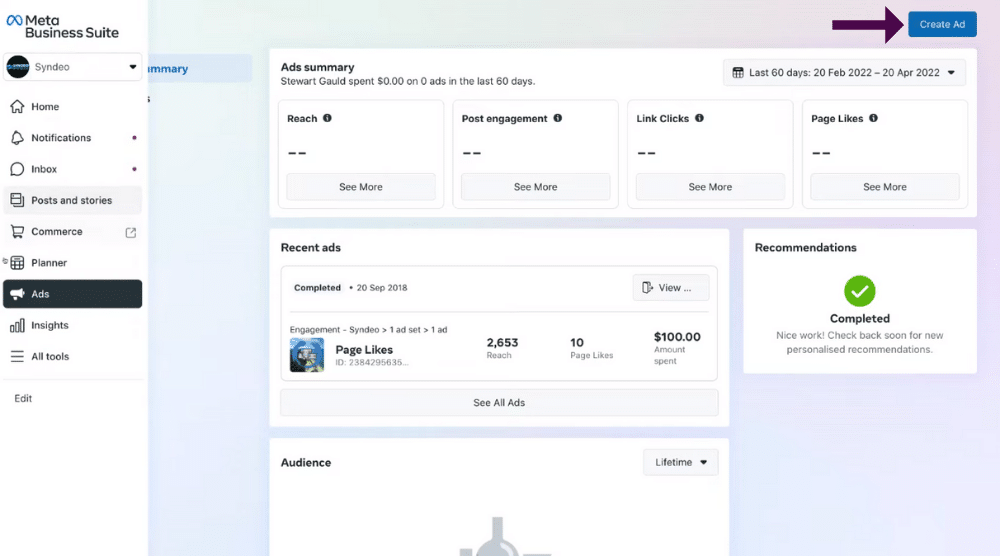
All you need to do is hit ‘Create Ad’ (top-right corner) and select an existing post to boost through paid advertising.
Obviously, this isn’t the same as creating ads within the Facebook ads manager.
If you want to create more comprehensive ads:
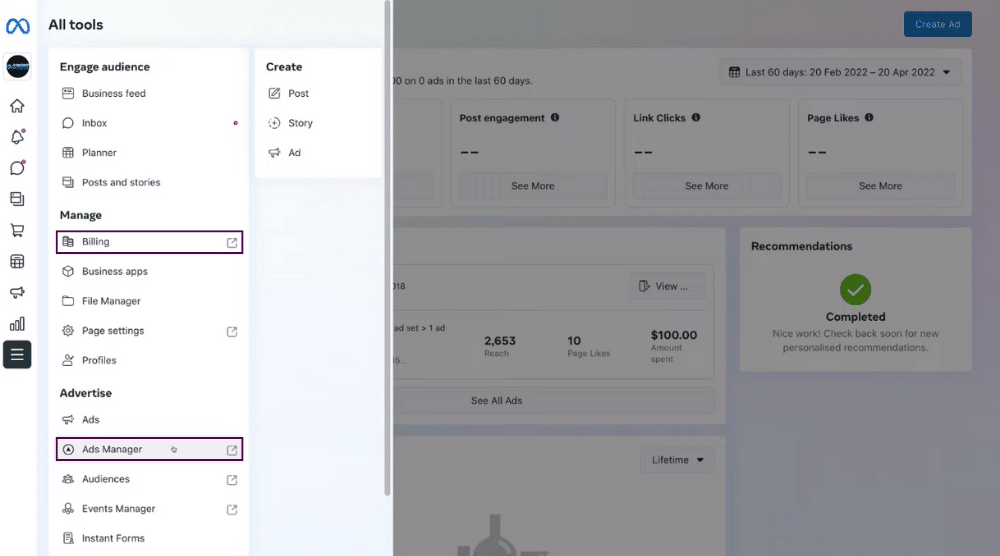
- Click on ‘All tools’ (see left-hand-side menu)
- Select ‘Ads Manager’ under ‘Advertise’
Under the ads manager is where you can create those comprehensive ads.
To learn more about it, watch this beginner’s tutorial where we cover it in great detail.
Take the time to explore more options under ‘All tools’.
For instance, to update your billing, you’d need to head over to ‘Billing’ below ‘Manage’.
11. Access Insights
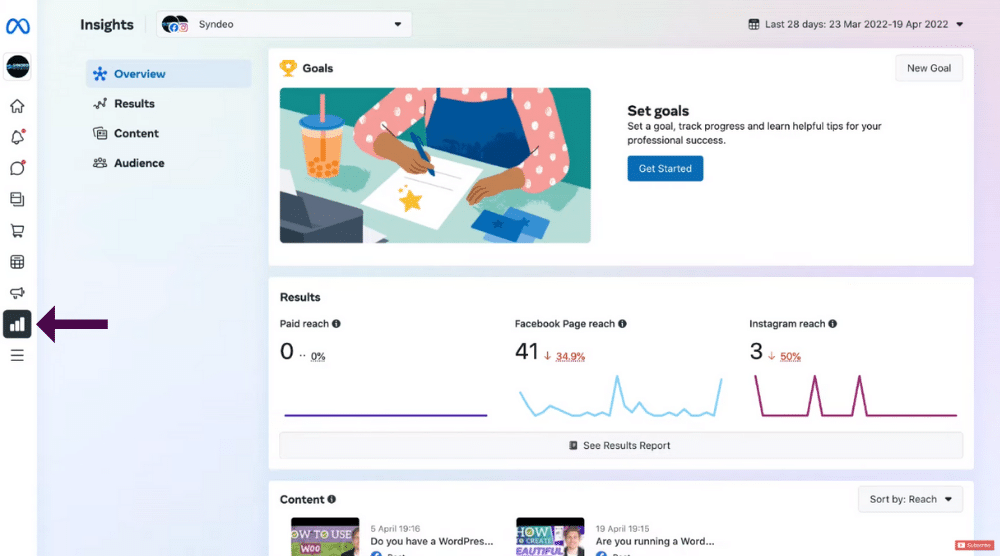
Select ‘Insights’ from the menu.
This is where you can create goals and view performance analytics.
That covers everything in this Meta Business Suite tutorial for beginners.
You’re now ready to grow your business using the all-in-one tool for managing Messenger, your Instagram Business account, and your Facebook Business Page.


Comments
Post a Comment