ConvertKit Tutorial for Beginners | Best FREE Email Marketing Software
In this ConvertKit tutorial for beginners, you’ll learn how to carry out important email marketing activities using this free email marketing software.
If you’re looking for a Mailchimp alternative, this could be your ideal solution.
ConvertKit is a popular email marketing and automation software designed specifically for entrepreneurs, small businesses, creators, and others that thrive on their ability to personally connect with their audience and community.
Before we dive into this tutorial, let’s explore a bit more about why email marketing is essential for small businesses.
Why Should Small Businesses Leverage Email Marketing?
Every business, irrespective of its size, wants to ensure that every dollar spent on marketing is well spent.
In particular, smaller businesses have unique needs yet tight budgets, which is why every penny should be spent wisely.
This is where the importance of a free email marketing solution comes into play. It lets you run email campaigns ensuring a high return on investment (ROI) and increased community engagement.
With the help of email marketing, small businesses can build their authority, increase their customer base, and improve their profitability.
Moreover, email marketing for small businesses helps you foster strong customer relationships, develop your unique brand, and strengthen credibility. And ConvertKit is one of the best free email marketing software in 2021 that could be ideal for you.
Getting Started with ConvertKit
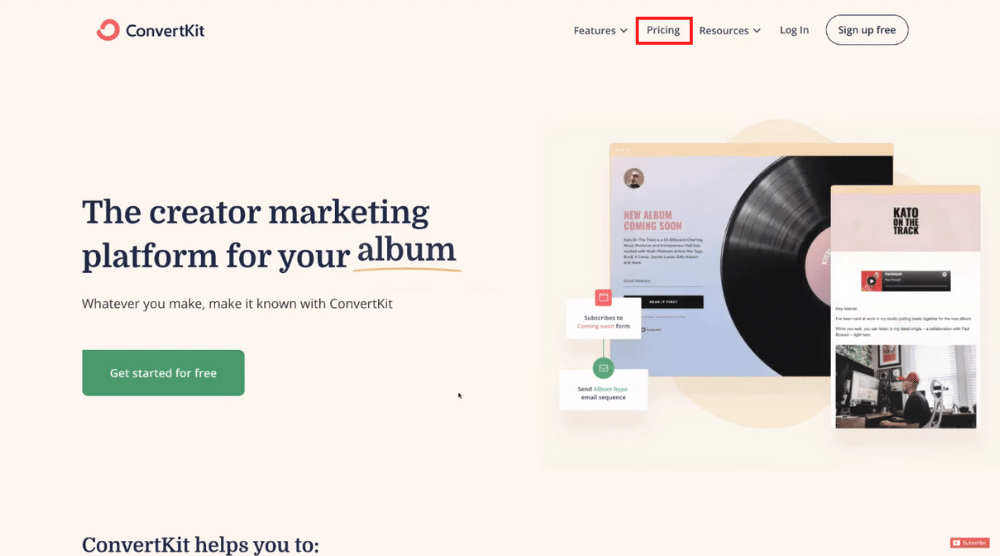 To get started with ConvertKit, head over to their website.
In this tutorial, we’ll explore how to use ConvertKit for email marketing using its free plan. On the top-right corner, you’ll find ‘Pricing’ – click on it.
Create Your Account
 Scroll down to find an option ‘Sign up for free’.
Under this free plan, you won’t be charged a cent for up to 1000 email subscribers. As your list of subscribers grows, you can upgrade to a paid plan – Creator (at $29 a month) or Creator Pro ($59 a month).
Under the paid plans, you can get access to automation. However, the free plan is sufficient for beginners and small businesses.
Using the free plan, you can:
- Create unlimited landing pages as well as forms.
- Send email broadcasts – these are email campaigns sent to all your contacts and subscribers.
- Sell digital products/subscriptions.
- Get email support.
Click ‘Sign up for free’ and select ‘No‘, I’m just starting with email’ in the next step.
For the next question, select ‘No’ again since we are going to show you how to connect a website with ConvertKit later in this ConvertKit tutorial for beginners.
Next, select up to 3 options that describe who you are as a creator.
We have selected designers, educators, and marketers. Hit ‘Continue’. Now, go ahead and add your email address and password. Check the ‘terms of service’ box and click ‘Get Started’.
Your ConvertKit account has now been created!
Verifying the Email
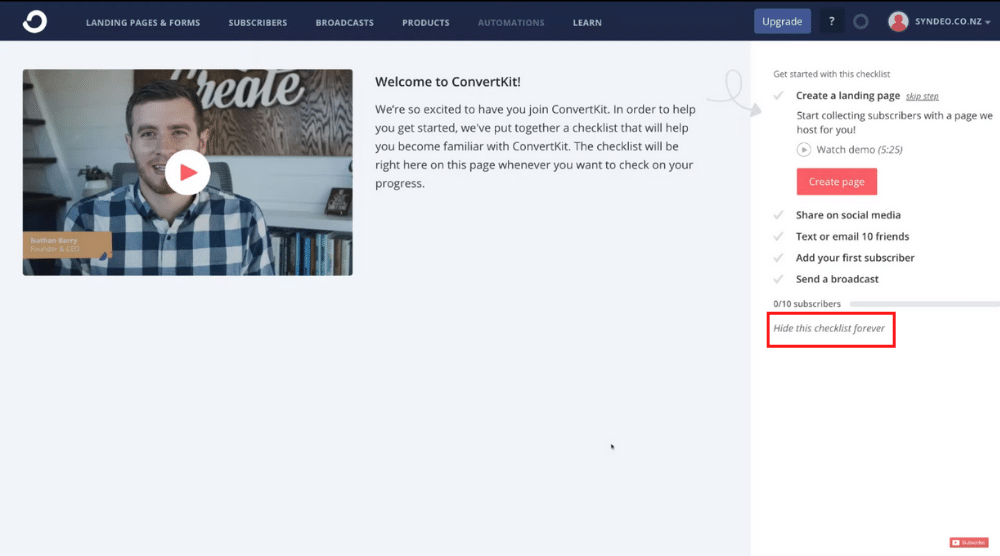 In the next step, you want to confirm your email. Head over to the inbox of your email account that you used to sign up to ConvertKit and confirm your email. After this, you will be redirected to your ConvertKit dashboard.
We can now start navigating through our ConvertKit account. Locate the checklist on the right and click ‘Hide this checklist forever’ because we are going to cover all this today.
Navigating the Account Settings
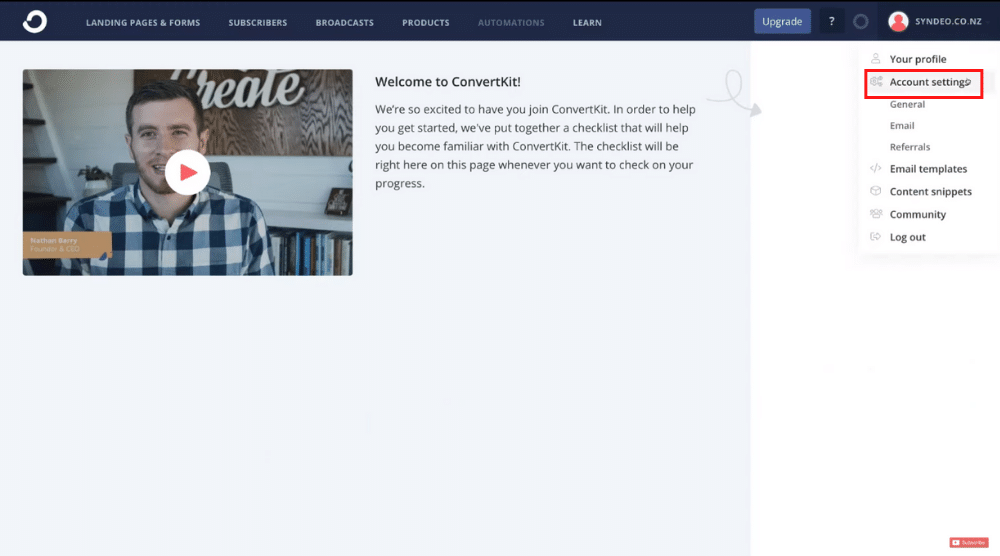 On the top-right corner, click on your business name and then select ‘Account settings’.
Under ‘Account Info’ add your company name. If you have a personal brand, you can put your own name under it instead.
Leave the other information as it is and click ‘Save Settings’.
Now, navigate over to ‘Email’ on the left-hand menu. Notice the name under ‘From Name’. This is the name that your subscribers will see when you send out emails.
Click the pencil icon and enter your name/business name instead. Next to that, we have the email addresses (used to sign up to ConvertKit) that your subscribers will see.
Adjacent to that, you can also see the email verification status as well.
Under the account settings, you can also set a default time to send emails. In the free plan, we don’t have access to automation. So instead, we’re going to use the email broadcast feature of ConvertKit.
Moreover, you are required by anti-spam laws to add the physical address of your business to this free email marketing software. Once you’re done, click ‘Save Settings’.
- Custom Domains
We will navigate back here after creating our first landing page with ConvertKit.
- Payouts
This is important if you’re selling products through ConvertKit.
- Referrals
This is where you can invite your friends to get started with ConvertKit.
Creating a Landing Page
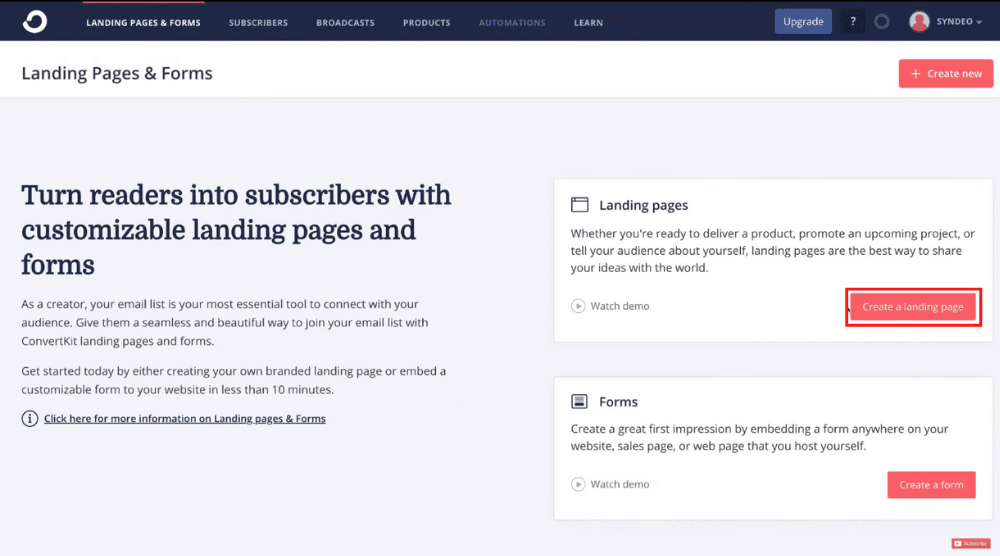 We’ll now move on to understanding how ConvertKit works.
In this section, you’ll learn how to create landing pages and forms for building your email list. On the top left, you’ll notice ‘Landing Pages & Forms’ – click on it.
Select ‘Create a landing page’ on your right. If you’re a beginner, we advise choosing and customizing a landing page template that you like.
You can preview each template before making a choice. To customize the text, for example, you can simply click the text, highlight it, and enter your own text content.
When you highlight a text, you’ll notice some basic text formatting options as well.
Navigate over to the left-hand side until you notice a ‘+’ icon. Click on it and then insert a file, numbered list, unordered list, or a blockquote, if needed.
You can also add another form field if you like. Currently, we have ‘Email Address’.
Hence, if a person lands on this page, they can enter the email address and hit ‘Subscribe’. To add a new field, click the ‘+’ icon, navigate to ‘Custom field’ on your right, and click ‘First Name’.
As you can see, the custom field label is now ‘First Name’.
Below that, select ‘Required’ or delete this field if you don’t need it. Follow the same process to add another field called ‘Phone Number’. You now have three fields on your landing page.
For each field, you can change the font colour, border colour, border radius, and font weight.
Now, under settings and ‘General’, you can leave a success message or edit the default one. This is what people would see after subscribing to your email list.
Alternatively, you can redirect to an external page when a person subscribes to your email list.
Below ‘General’, you’ll notice another setting option called the ‘Domain Name’. Here, you can select your domain name. However, for this ConvertKit tutorial for beginners, we’re going to select a default (free) domain name.
Below that, you want to give your landing page a URL. For example, you can type ‘join us’ under the field ‘Page URL’ and click ‘Add’.
Under ‘Incentive’, you can check the box that says ‘Send incentive email’. When a subscriber signs up through this landing page, they will be sent this email. Moreover, you can edit the email contents here if you like.
Alternatively, you can check the box that says ‘Auto-confirm new subscribers’ but we recommend selecting the first box so that your subscribers can confirm that they want to join your email list.
Below that, you can either offer your subscribers something to download or redirect them to a URL.
Now, under ‘Advanced’, you can change what’s shown to return visitors who have already subscribed to this landing page.
However, we’ll leave it as ‘Continue to show the form’ for this ConvertKit tutorial for beginners.
Below ‘Advanced’ we have ‘SEO & Analytics’. This is important for ranking your landing page on search engines like Google.
However, this is too advanced to cover in this tutorial. Hence, you can come down and click ‘Save’.
Apart from that, you can create and customize a ‘thank you’ page if you like. To view how your landing page looks to the visitor, click on ‘Preview’.
You can now ‘Save & Publish’ your first landing page made using one of the best free email marketing software in 2021.
Heading back to ‘Landing Pages & Forms’, you can see the number of visitors, subscribers, conversion rate, and basic analytics for the newly created landing page.
Creating a Website Form
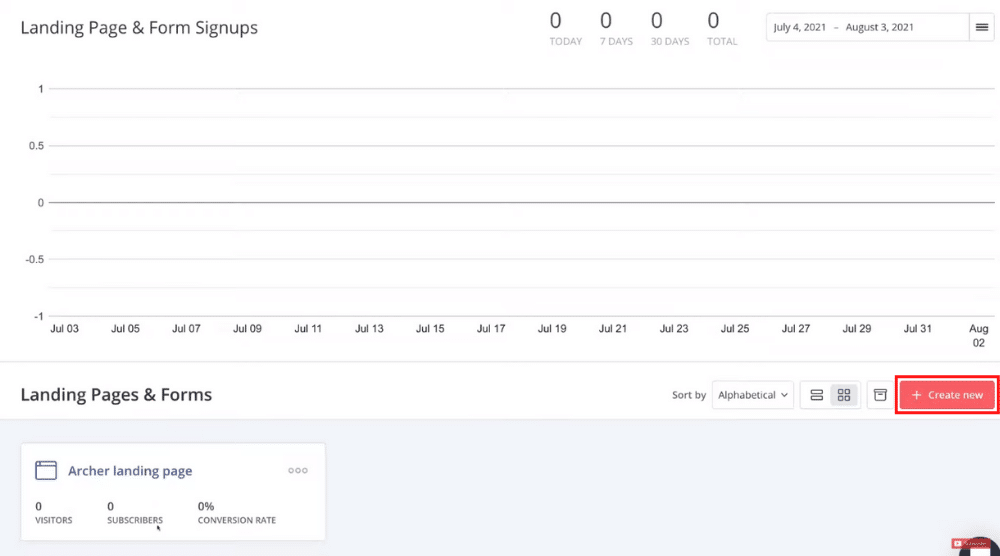 Under ‘Landing Page & Forms’, select ‘Create new’ to create a new website form.
Skip this part if you don’t want to create it or don’t have a website. Select a display format ‘Modal’ which is suitable for creating a pop-up form.
Choose a template and then by using the method explained for creating the landing page, you can go ahead and create a website form. Under ‘Display Options’, you can choose when the website form should appear.
It could be when:
- They are about to exit the page – exit intent
- They have scrolled a certain percentage of the page – scroll percentage
- The visitor has spent a certain amount of time on the page – the timing
Once you’ve created the popup form, click ‘Embed’.
Choose any of the following options to embed your popup form:
- JavaScript
- HTML
- Share
- WordPress – the most popular option among others
- Unbounce
To choose the WordPress option, you would have to download the ConvertKit WordPress plugin. Copy the code shown in the screengrab and follow the step-by-step method or get in touch with a developer who can do this for you.
Managing Your Subscribers (Contacts)
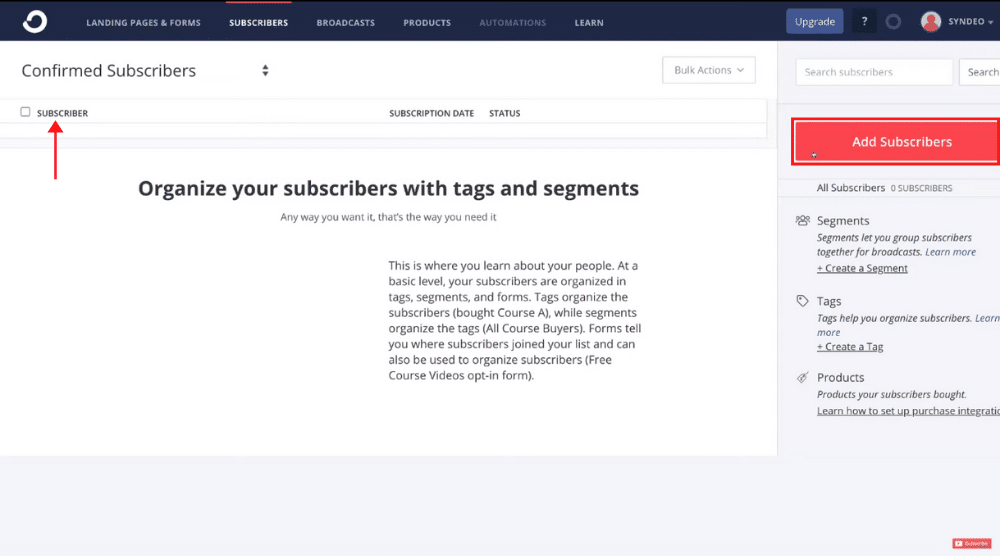 Click ‘Subscribers’ and this is where you can start adding your subscribers to build an email list.
We will now proceed to create the segments and tags using this free email marketing software.
Creating Email Segments
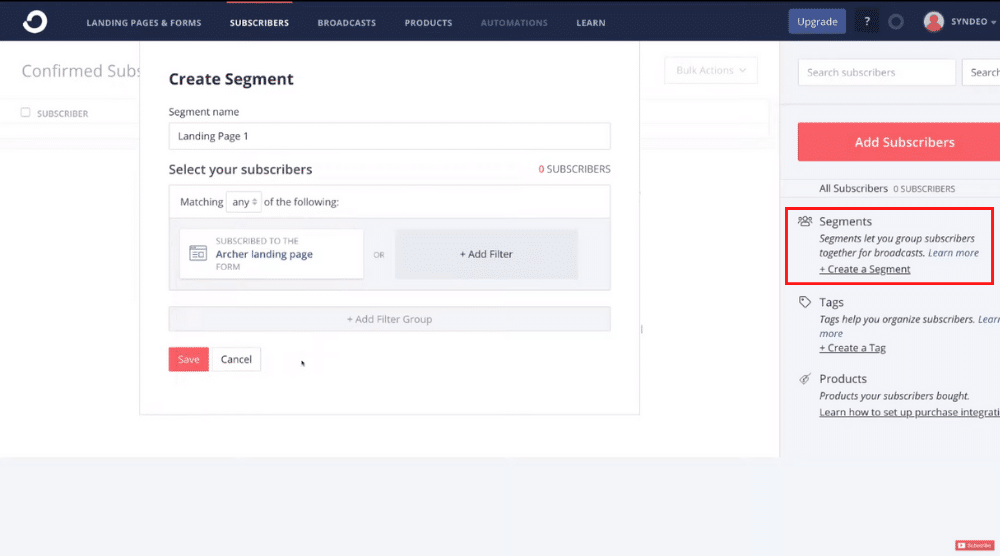 Under the ‘Segments’, you can group your subscribers to run specific email campaigns.
For example, you can name your first segment ‘Landing Page 1’. And then click ‘Add Filter’ and select ‘Forms’ under ‘Subscribed to’.
Below that, pick your landing page from the drop-down. Click ‘Add filter’ and hit ‘Save’. Similarly, you can create another segment for your popup form.
Creating Tags
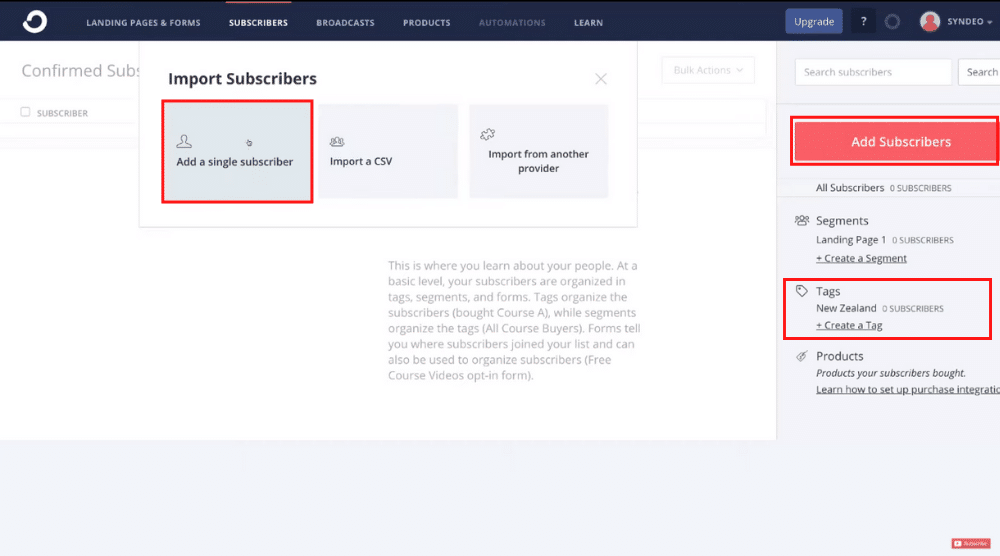 These help you organize your subscribers.
For example, you can create a tag according to the geographic location, we will name this tag New Zealand.
You can also create another field within your landing page called ‘Country’ and this is where your potential subscribers would have to enter their country while subscribing to your email list.
And if they enter ‘New Zealand’, then they go to the New Zealand tag.
Now, you can click ‘Add Subscribers’ and select any of the following alternatives:
- Import from another provider
- Import a CSV
- Add a single subscriber
The first two options are pretty straightforward and ConvertKit guides you through them. Hence, we’re going to select ‘add a single subscriber’.
Go ahead and add the first name, email of your first subscriber. Under ‘Include these subscribers’, click ‘Tags’ and select New Zealand.
Hit ‘Save’. Similarly, you can add more subscribers. For each one of them, you can add an additional field (country, for example), email address, or phone number and then hit ‘Update Subscriber’.
Moreover, under ‘Email History’, you can see all the emails that have been sent to the subscriber, automation that they have been part of, and other information.
If you scroll down, you can find the options to delete, unsubscribe, or block any subscriber. For example, if a subscriber has never engaged with your emails, you can delete them – especially if you have nearly reached the 1000-subscriber-limit under the free plan of this free email marketing software.
Creating Broadcasts (Email campaigns)
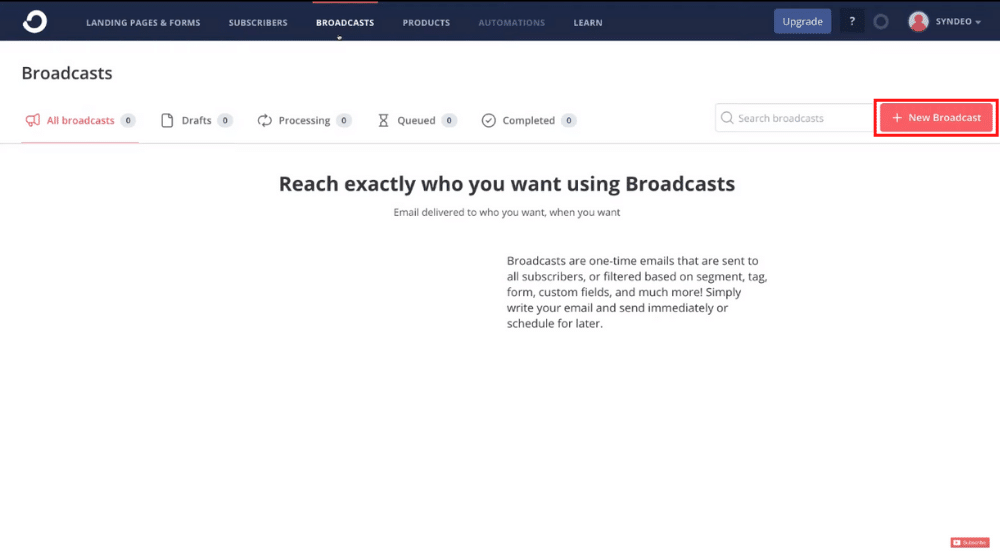 Next to ‘Subscribers’, we have ‘Broadcasts’. This is where you can create email campaigns to send to your email list, your subscribers that you have added or captured through the landing page and popup form. To do that, navigate over to ‘New Broadcast’ and then enter a subject line.
Make the subject line as compelling and enticing as possible. You can even add another subject line and run A/B testing to analyze which one performs better.
Below the subject line, you can create personalized email content. Type in the text and click the ‘+’ sign. Select ‘Personalization’.
You can also hyperlink any part of the text if you like or change it to a numbered list or heading 1. Below the URL, you’ll find the option to tag your subscribers as well.
The idea is to keep your emails simple yet personalized for each of your subscribers. Once you’ve created the broadcast, click ‘Continue’. Here, you can preview your email – the body, two subject lines, from address, and subscribers.
At the moment, it’s displaying ‘All Subscribers’. You can go ahead and add a filter or leave it as it is.
You can either send the broadcast now or schedule it for a later date and time. When you’re happy with your broadcast email, click ‘Continue’.
Check the final preview of the broadcast before hitting ‘Send Broadcast’.
Congratulations! You’ve just sent your first email campaign with ConvertKit.
For each campaign that you create, you can see the number of clicks, click rate, open rate, and unsubscribers.
Related: BEST Email Marketing Software
ConvertKit Tutorial for Beginners
With ConvertKit, creating an effective and personalized email marketing campaign is simple and enjoyable.
Regardless of your experience level, you can create and run professional email marketing campaigns with ConvertKit.
I’ll also walk you through the step-by-step video tutorial on ConvertKit if you want a more visual learning experience. Enjoy watching the video tutorial and let me know if you have any questions.
Watch Video: ConvertKit Tutorial for Beginners

.png)


Comments
Post a Comment