How To Create a WordPress Website using Elementor Cloud | WordPress Tutorial for Beginners
Did you know a staggering 35-40% of all websites are built using WordPress?
In this blog, I will share How To Create a WordPress Website using Elementor Cloud in 15 easy steps.
Using WordPress, you can build premium websites of varying types and sizes.
However, building a site using WordPress is not exactly straightforward (It’s not as easy as people make it out to be!), especially if you have no prior web design and web building experience.
There’s a lot involved in creating a site, including choosing the right hosting provider, connecting a domain, installing WordPress, getting an SSL certificate, designing website pages, and more.
The entire process can become quite overwhelming for most people (especially for non-techies!).
On the bright side, I’m excited to share an all-in-one, hassle-free WordPress website building solution called Elementor Cloud (a new Elementor product).
This platform removes all the technical barriers involved in creating a website so that your site can get up and running in minutes!
Therefore, in this WordPress tutorial for beginners, we’ll dive into this step-by-step process of building a WordPress website using Elementor Cloud.
What is Elementor Cloud?
Elementor is one of the most intuitive and easy-to-use platforms designed for crafting a premium WordPress website with the focus of making the process of building a website hassle-free and simple.
To get started:
Get started with Elementor cloud for FREE here
*The link above is an affiliate link, which means we will get a commission if you upgrade to a paid plan (with no extra cost to you). This helps support our education-based website and we thank you in advance!
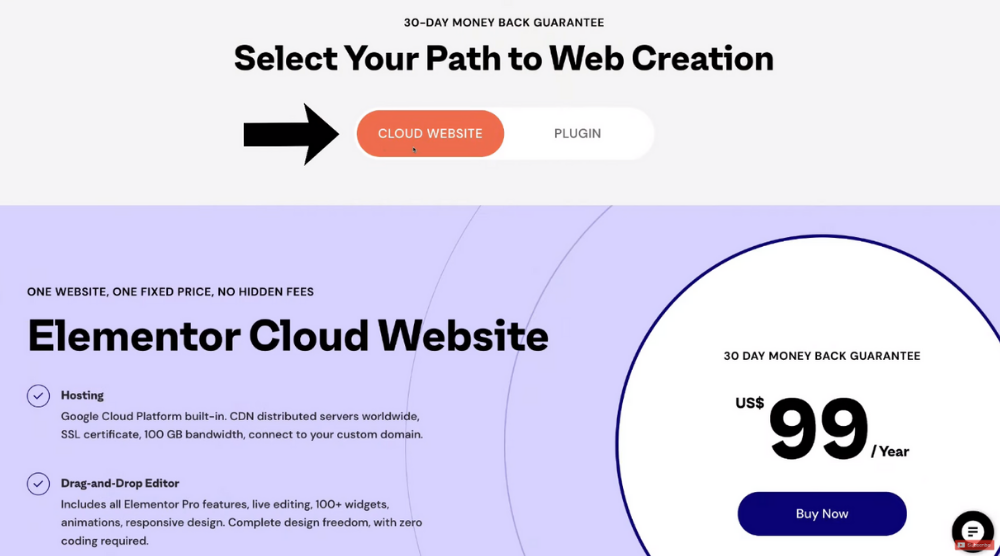
- Visit elementor.com/pricing or click this link.
- Select ‘Cloud Website’
- Scroll down to ‘Elementor Cloud Website’
- Notice the attractive pricing at US$ 99 per year.
This includes :
- Website hosting (usually around $10 – $45 per month)
- 20GB of storage
- 100GB of bandwidth
- SSL installed
- WordPress installed
- Elementor Pro installed (easy to use visual page builder). Usually $49 per year.
- Automatic backups
- Chat support from within your WordPress dashboard.
If for any reason, you feel that Elementor Cloud isn’t working out for you, don’t worry.
You are protected by a 30-day money-back guarantee (You do need to send them a message to request this refund).
Steps for Creating a WordPress Website using Elementor Cloud
Now that you know more about Elementor, let’s begin our Elementor Cloud tutorial and help you understand how this platform works.
1. Get Started with Elementor Cloud
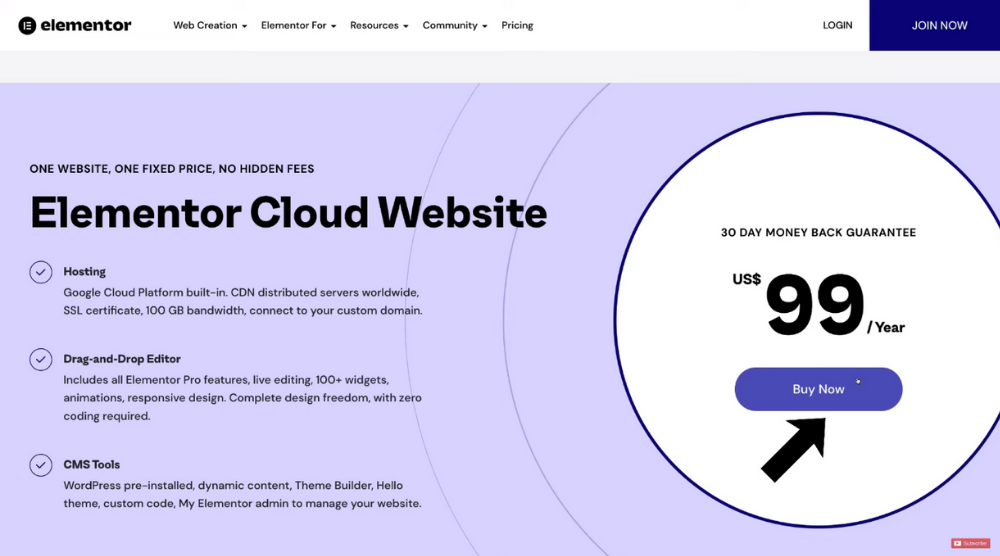
- Under the pricing plan, tap on ‘Buy Now’
- Complete the signup. You’ll be inside the Elementor dashboard.
- Click on ‘Create Cloud Website’ (top-right corner)
- Add your site name. For this Elementor Cloud tutorial, we’ll use our agency’s name – Syndeo Media.
- Hit ‘Next’
- Notice the free branded domain name . You can, of course, purchase a custom domain and add it later on.
- You can edit the site name part of the URL if needed
- Hit ‘Next’
- Choose the website type. We’ll go for the ‘Business/Corporate website’
- Next, you can select a premade website kit. But we’ll start from scratch for now and choose a kit later on.
- When you see the ‘Site Ready’ prompt, hit ‘Let’s Go!’
Now give Elementor Cloud a moment to set up your website.
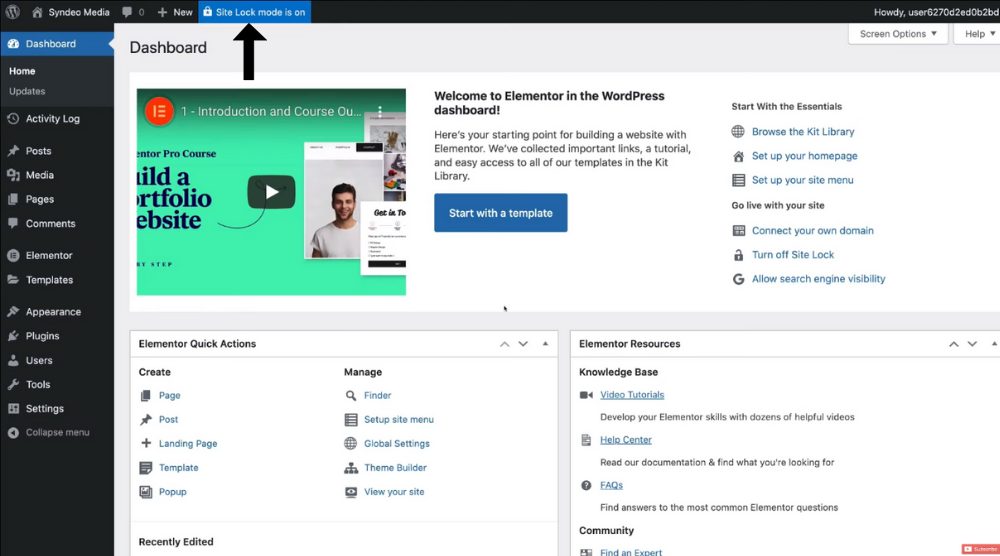
2. Understand the Elementor Cloud Dashboard
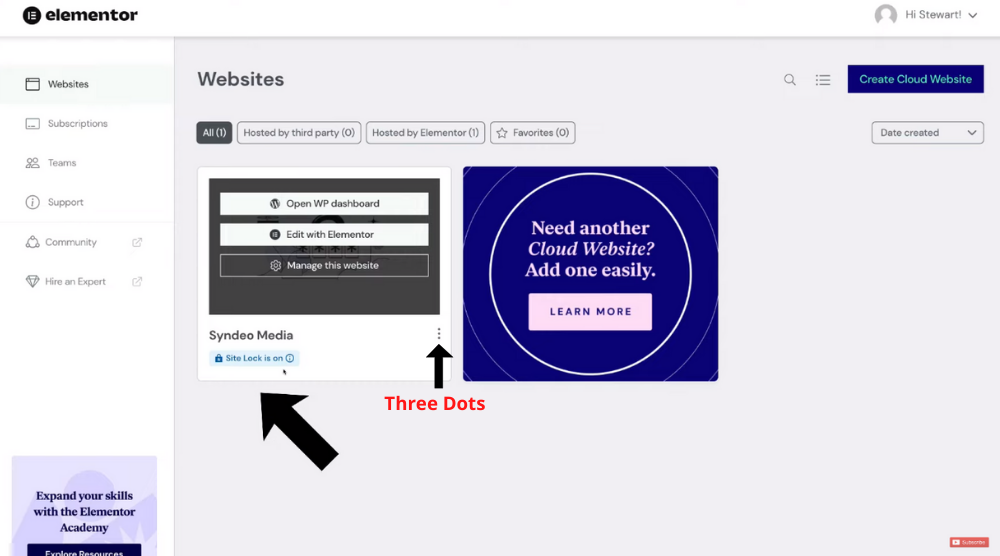
Before we reveal how to create and customize a WordPress website using Elementor, it’s crucial to understand the Elementor Cloud dashboard first.
- Notice that the site lock is currently on, which means that our website isn’t live yet. And we prefer it that way since we haven’t created our website yet. We can disable the site lock once the website is ready to be published online.
- Click the three dots next to the site lock. You can view related subscriptions here or unlock your website.
- When you open the subscription details, you can select ‘Auto Renewal’ (top-right corner) anytime you want. This will enable the automatic renewal of your plan each year.
Now click on ‘Websites’ (top left-hand corner) where you’ll see three options:
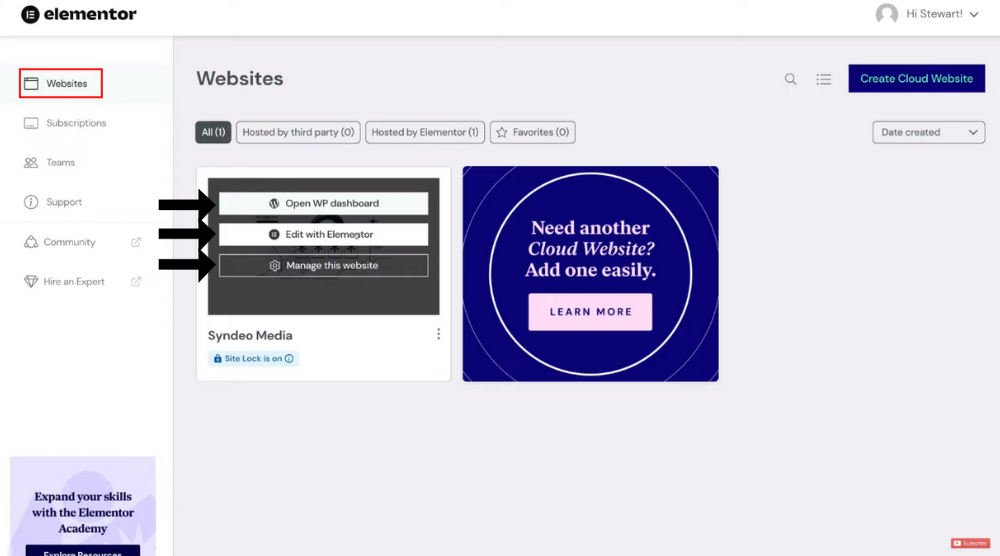
- Open WordPress dashboard
- Edit with Elementor
- Manage the website
We’ll pick the third option for now. The basic site information will be generated for you.
Here you can see the site name and URL at the top.
And under ‘Managed Domains’ is where you can add a custom domain.
For this Elementor Cloud tutorial, however, we’ll continue with the branded Elementor Cloud domain.
Under ‘Managed Domains’, you’ll also see that the SSL certificate has already been installed, which means that your WordPress site is secure.
If you open your website right now, you’ll notice a lock icon near the URL.
It tells people that the website is safe to visit.
Read more : How To Get A Free SSL Certificate for WordPress
3. Access Automatic Backups
This is where you can take automatic backups and restore your WordPress website.
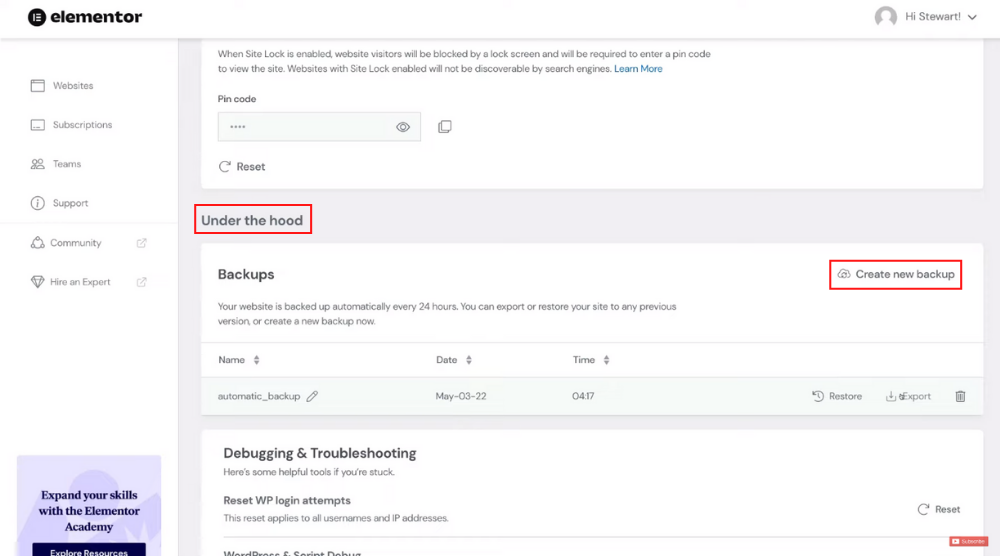
- Scroll down to ‘Under the hood’
- Observe that a site backup has already been created by Elementor.
- You can also manually back up your website by clicking on ‘Create new backup’
This is crucial.
If your site goes down due to a clash between plugins, updates, or themes, you can easily restore it from here.
You can also export the backup to your computer for safekeeping.
Now, let’s understand how to use Elementor to customize your website.
4. Create & Customize Our Website
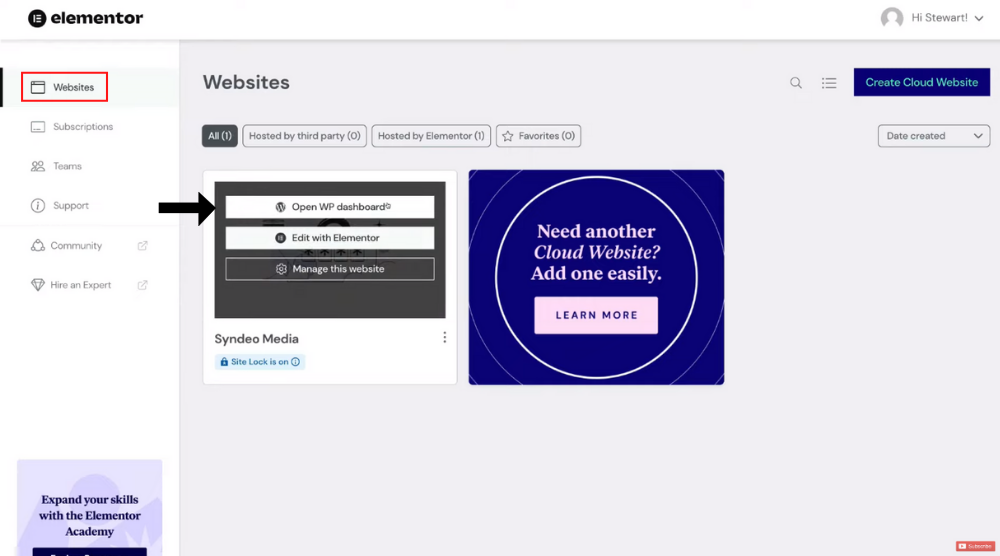
- Head back to ‘Websites’
- Select ‘Open WP dashboard’
This will take you inside your WordPress dashboard, where you can start customizing your website.
Also read: Create a Free Website with WordPress
5. Find Elementor Support
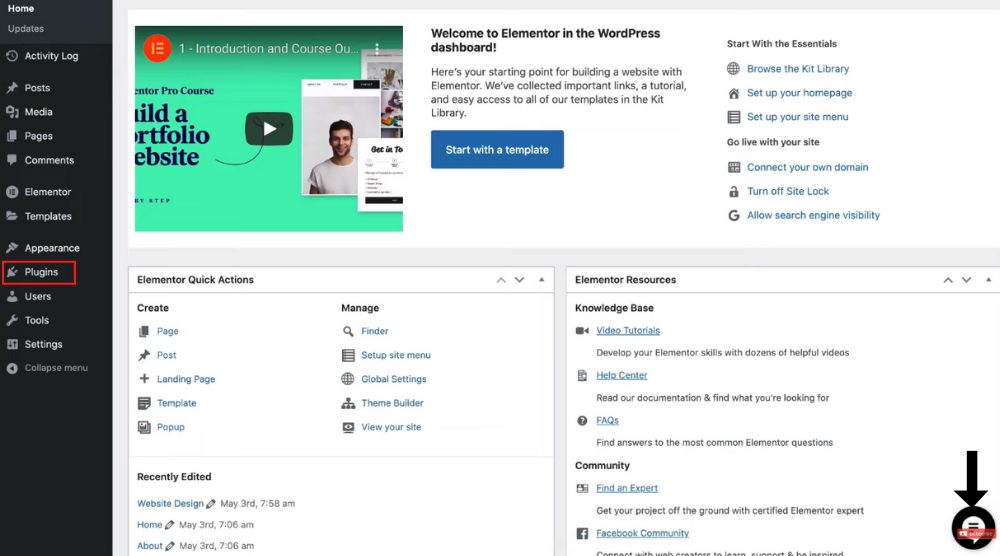 Notice the chat icon in the bottom-right corner?
That’s where you can contact the Elementor support team when you need help.
This is a valuable feature in case anything goes wrong with your website or you have any questions.
Most of the groundwork needed to create a website has already been done by Elementor Cloud.
For instance, navigate over to ‘Plugins’ and you’ll find that the Elementor Pro plugin has already been installed and activated.
If you’re a beginner reading this, basically plugins are extensive features that you can add to your WordPress website.
To add a new plugin, all you’d do is:
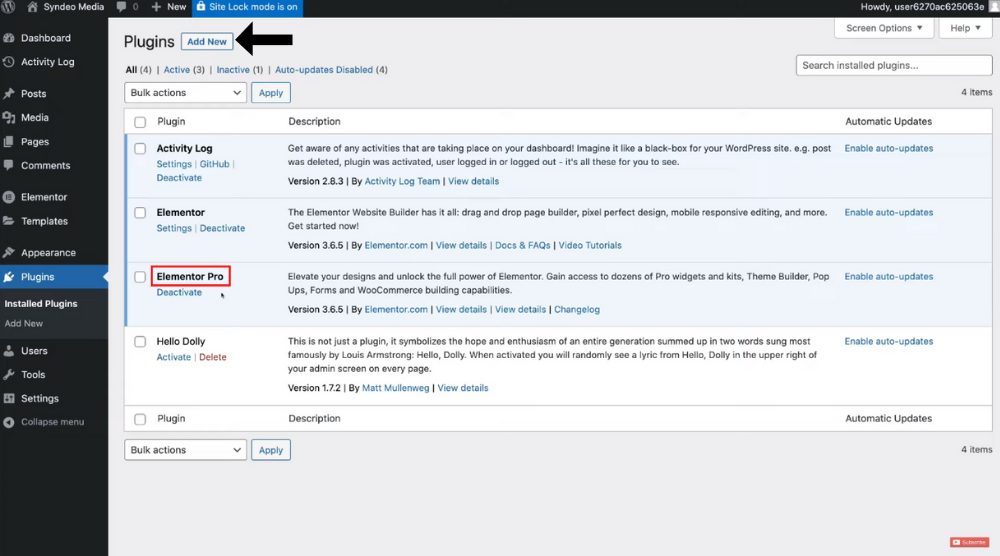
- Select ‘Add New’
- Locate the plugin from the search bar
- Install and activate it
Note: Not all plugins are compatible with Elementor Cloud. Here’s a list of incompatible plugins that you must check out.
Explore the Theme
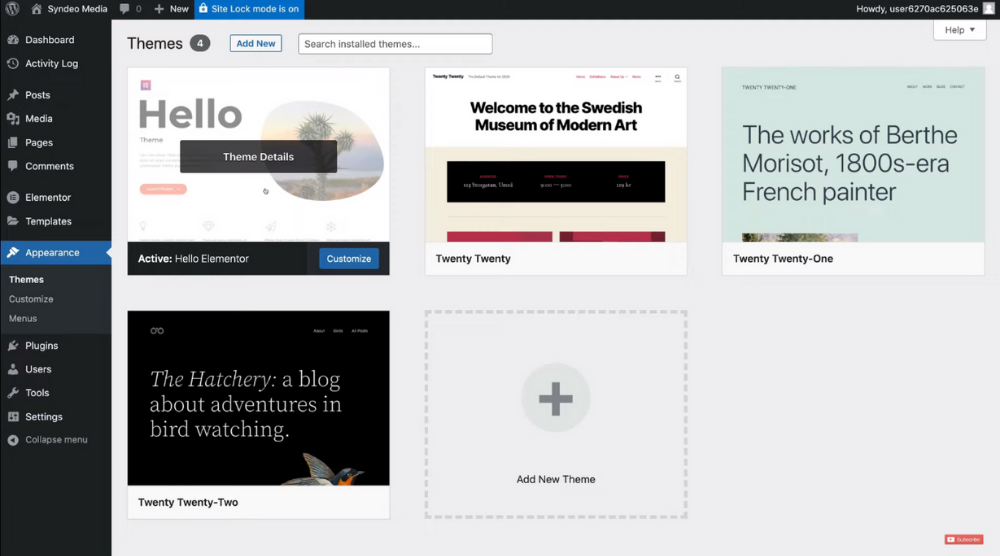
A theme determines the overall structure and style of your website.
Visit Appearances > Theme to check out the current theme.
For this WordPress tutorial 2022, we’ll keep using the Hello theme. It’s a lightweight yet powerful Elementor theme.
You can, of course, install a different WordPress theme if you like.
Note: We’ve created a WordPress 101 tutorial if you want to understand WordPress in detail (ideal for complete beginners that are navigating WordPress for the first time).
6. Use Elementor Website Kits
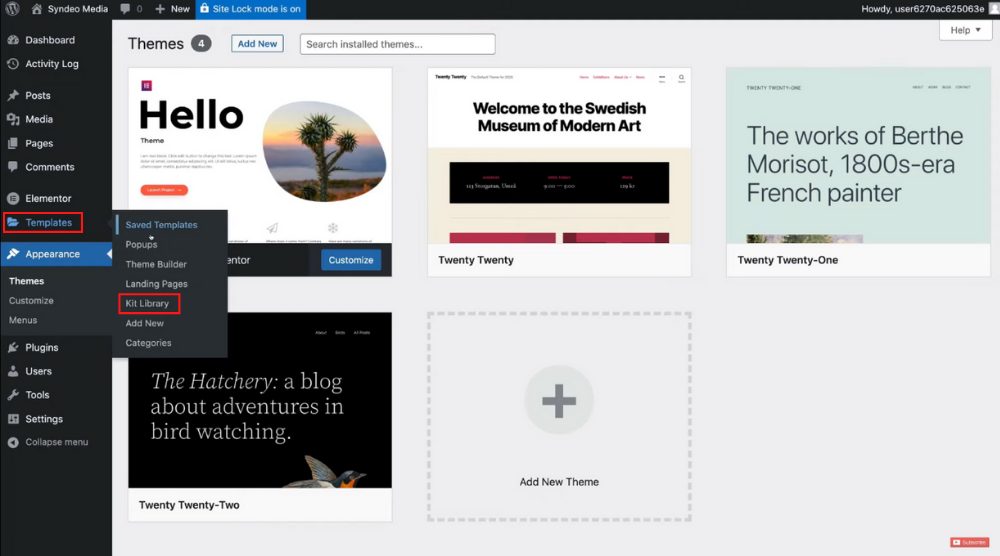
- Select ‘Templates’ from the menu
- Click on ‘Kit Library’
- Hit ‘View Demo’ to explore a specific Elementor website kit. Take the time to go through the individual web pages within the kits.
- Preview how the pages would look like on mobile, desktop, and tablet. You’ll find the preview buttons right in the top-middle area.
- Select ‘Back to Library’ to exit the demo.
- You can also locate a specific website kit using the search bar
- In the top-right area, click the drop-down next to ‘Featured’. This is where you can sort the kits by these criteria: trending, new, popular.
- Tick off the categories on the left to further refine your search. For this WordPress tutorial 2022, we’ll choose the ‘Business and Services’ category. After that, we’ll go with the Digital Marketing Agency website kit.
- After viewing the demo, click on ‘Apply Kit’ (top-right corner) and then select ‘Apply All’.
- Next, Elementor will ask you to pick the elements you want to include on your website. For this tutorial, we’ll keep all the elements selected because we want to import the entire kit.
- Hit ‘Next’
- Once your site is live, click ‘Close’ (bottom-right corner)
- To exit out of the kit library, hit the ‘X’ icon in the upper-right corner.
To view what your website looks like right now:
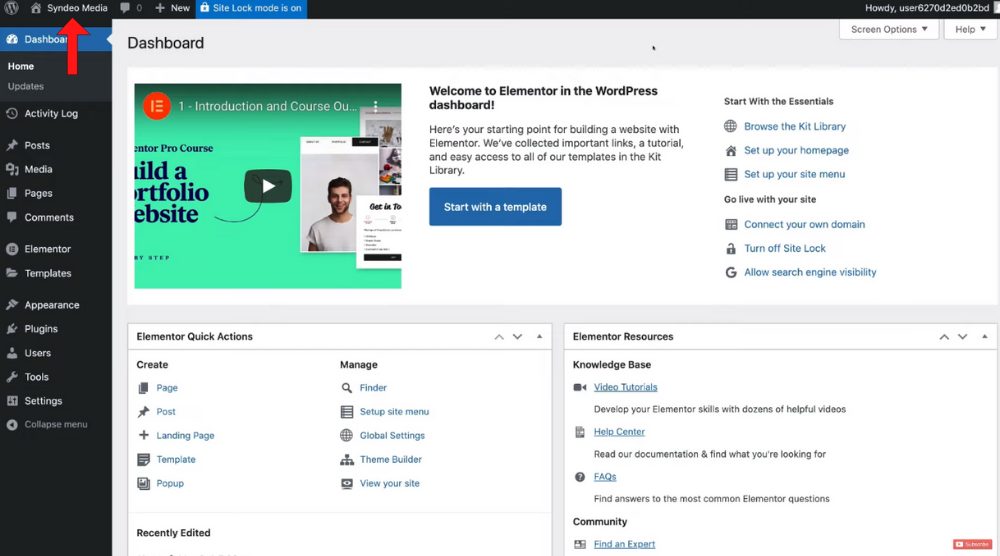
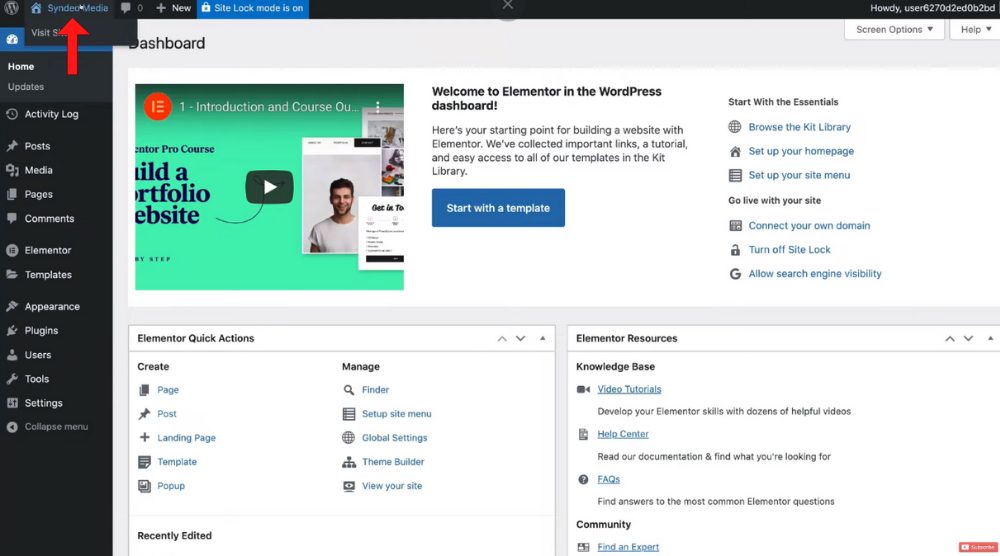
- Tap on the site name located in the upper-left corner (in our case it’s Syndeo Media)
- Select ‘Visit Site’
7. Add a Website Logo

- On your website, click on the site name again.
- Select ‘Dashboard’.
- Choose Appearances > Customize > Site Identity
- Tap on ‘Select logo’ and upload your logo.
- Hit ‘Publish’.
You might need to refresh your page if you don’t see the logo.
Head back to the dashboard.
Note: Watch this beginner’s tutorial on Canva to design your logo if you don’t have one.
Read more: Canva Free Logo Maker
8. Customize Website Pages with Elementor
It’s time to customize the pages in this WordPress tutorial for beginners. We’ll do so by using the Elementor Pro plugin which gives us access to their easy drag-and-drop editor.
- Click on ‘Visit Site’
- Select the page you wish to customize. For this Elementor Cloud tutorial, we’ll customize the homepage.
- Tap on ‘Edit with Elementor’
Before we go ahead and customize the homepage, it’s important that you understand the WordPress page structure, which is as follows:
- Sections
- Columns within sections
- Elements or widgets within the columns
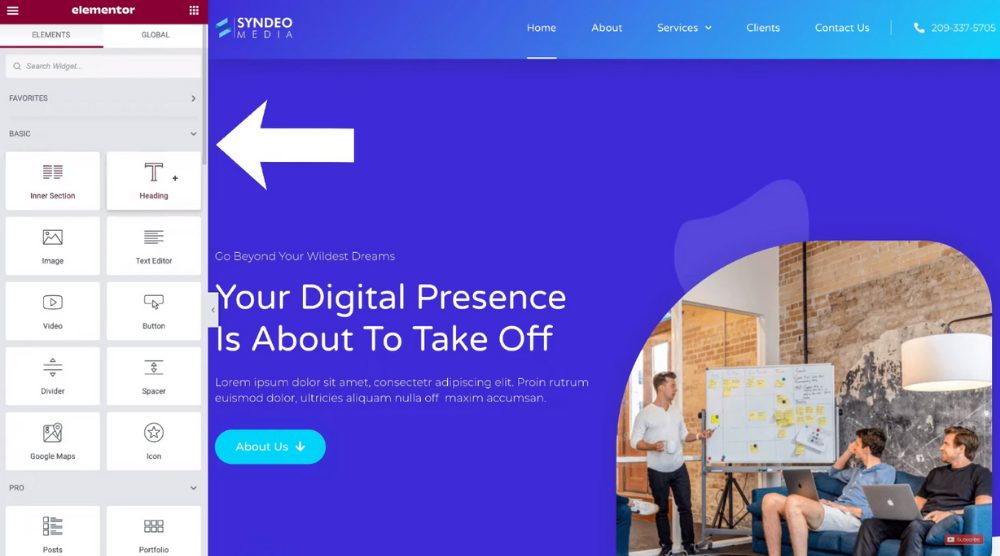
The widgets or elements are located on your left.
To add those to the homepage (or any page), simply click and drag and drop them.
You can, of course, edit the existing elements on your homepage.
To customize the text elements from the pre-made site kit, simply do the following:
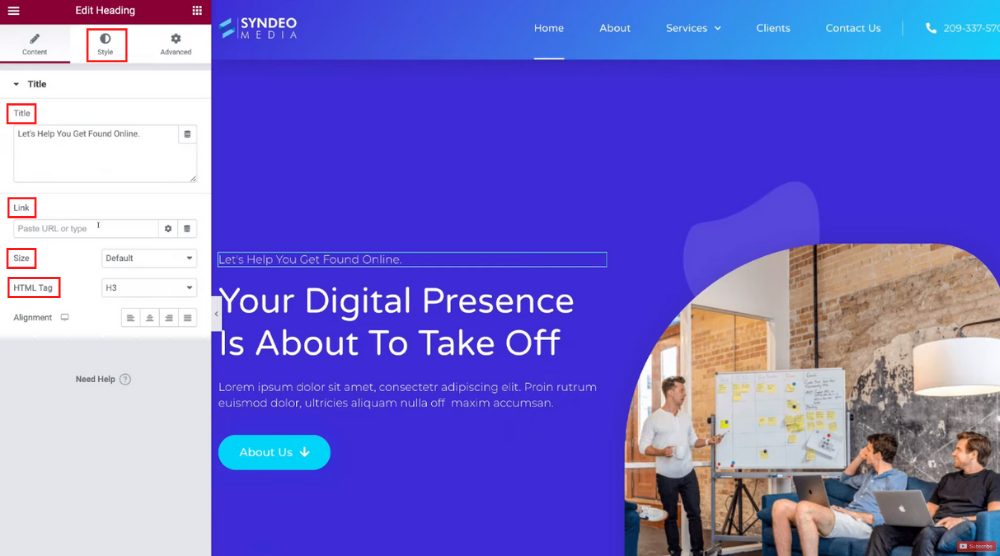
- Select the element
- Start editing the text right on the website or on your left. Refer to the screengrab.
- Go through the other customization features like including a title, link, HTML tag, modifying the size, etc.
- Click on ‘Style’ next to ‘Content’. This is where you can change the text color, typography, text shadow, and more.
- Click on ‘Preview Changes’ to see what the changes would look like.
- Select ‘Update’
On the Elementor editor, you can also view the customization history.
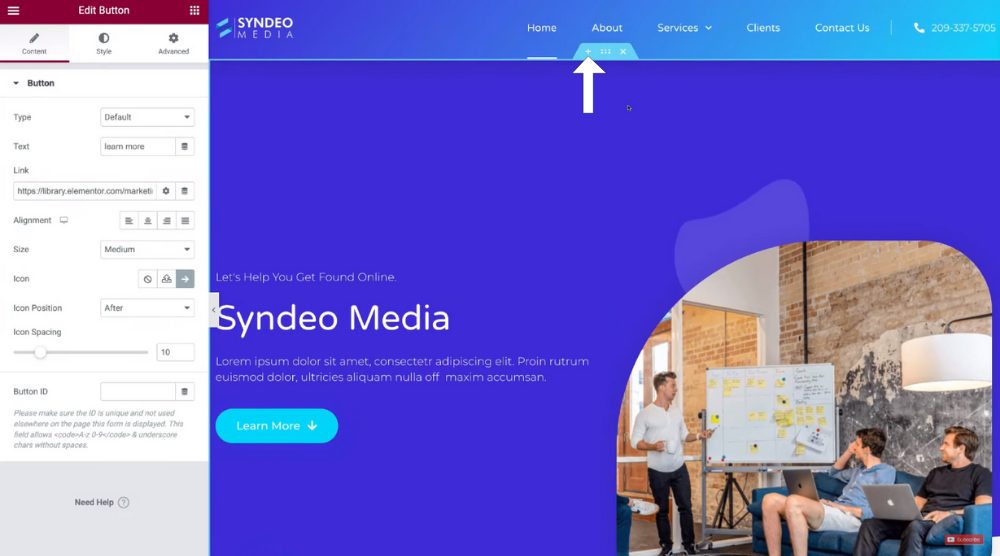
Now, let’s customize the button element in this WordPress tutorial 2022:
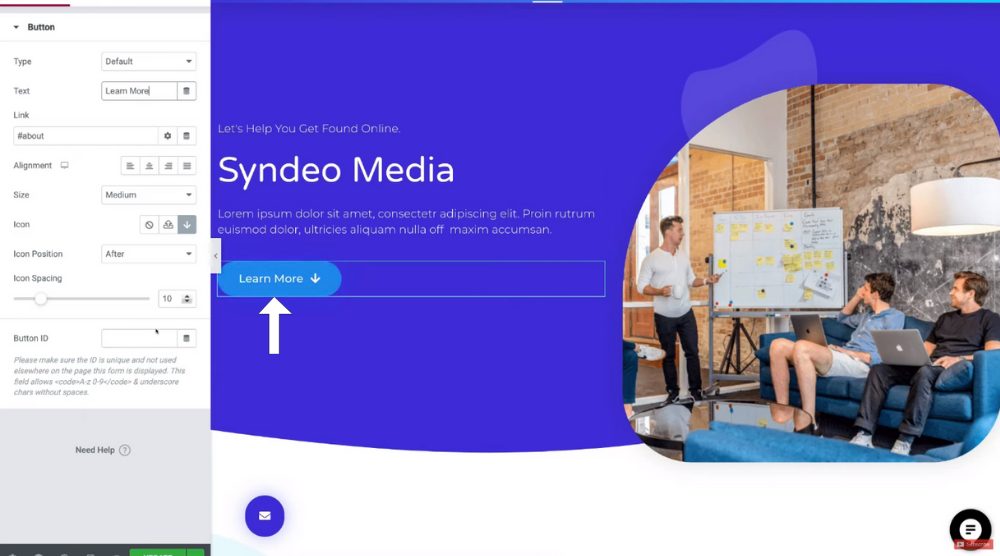
- Select the button element (if you have one in your template)
- We will change the button text to ‘Learn More’
- Change the button link if you want
- Hit ‘Update’
Using the Elementor drag-and-drop editor is quite easy!
For all the elements on your website page, you can simply edit and replace the content with your own unique content.
To replace the default image:
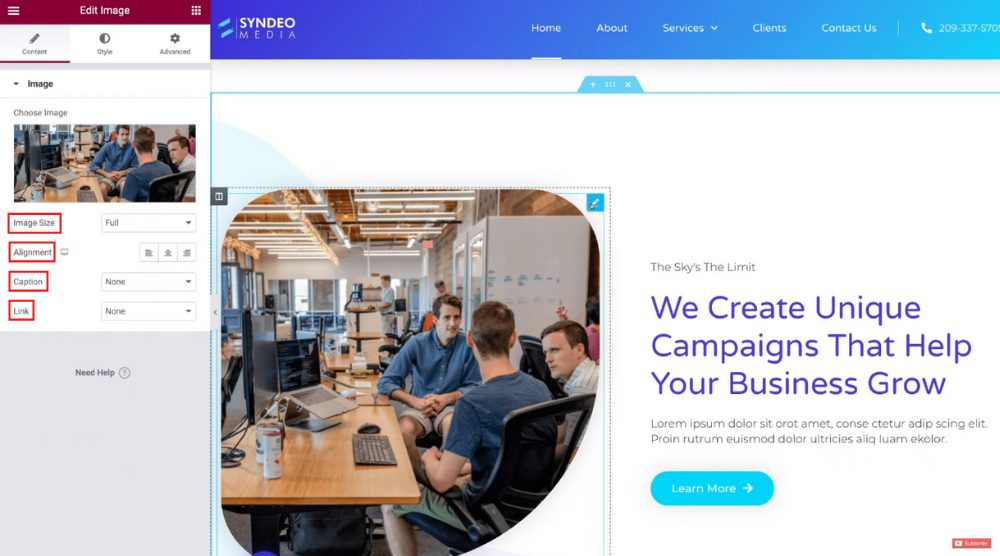
- Select the image element
- Upload a new image on your left
- Check out other options like image size, alignment, caption, and link.
Similarly, you can customize the other elements on the homepage.
To delete an element:
- Select the element
- Hit right click > Delete
To duplicate an element:
- Select the element
- Hit right click > Duplicate
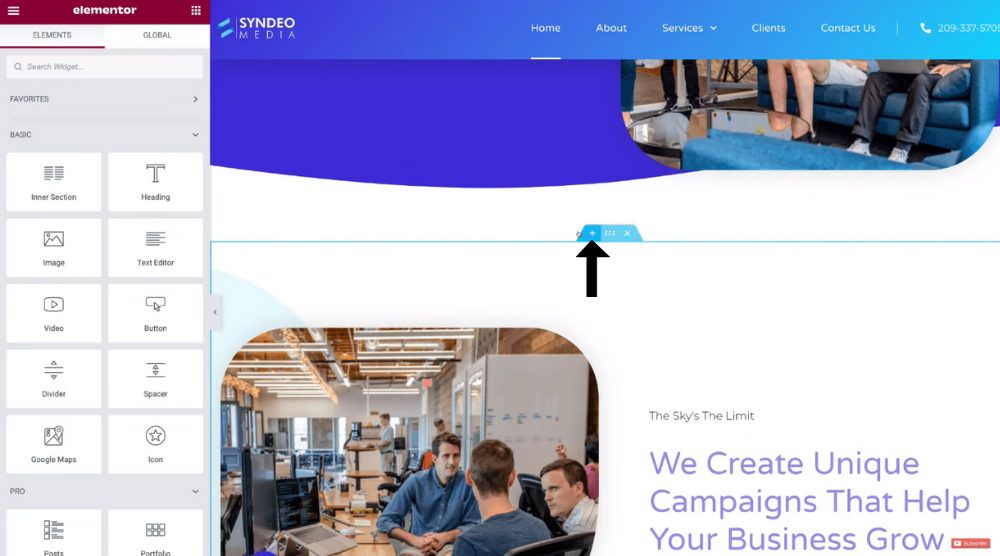
Besides the elements, you can also add new sections.
- Hover over a section
- Click the ‘+’ icon
- Select the structure
- Drag and drop columns to your section
- Add your elements
9. Add a Template Section (Block)
Did you know that you can add templates to the existing web pages?
Here’s how:
- Select a section
- Click the ‘+’ icon
- Tap on the file icon
- Import page templates or head over to ‘Blocks’. These are premade sections that you can add to your website pages.
- Filter the blocks by choosing the required option from the drop-down menu. For instance, you can select ‘Call to Action’ to generate relevant blocks.
- Click ‘Insert’ to add a block.
- Customize the block and hit ‘Update’
10. Customize the Header & Footer
The header (top of each page where your primary menu and logo is located) and footer (bottom of each page) should be the same across all your website pages.
Let’s understand how to customize them in this Elementor Cloud tutorial.
- Select the header
- Click the phone number element if you have one on your template. Replace it with your business phone number.
- Hit ‘Update’
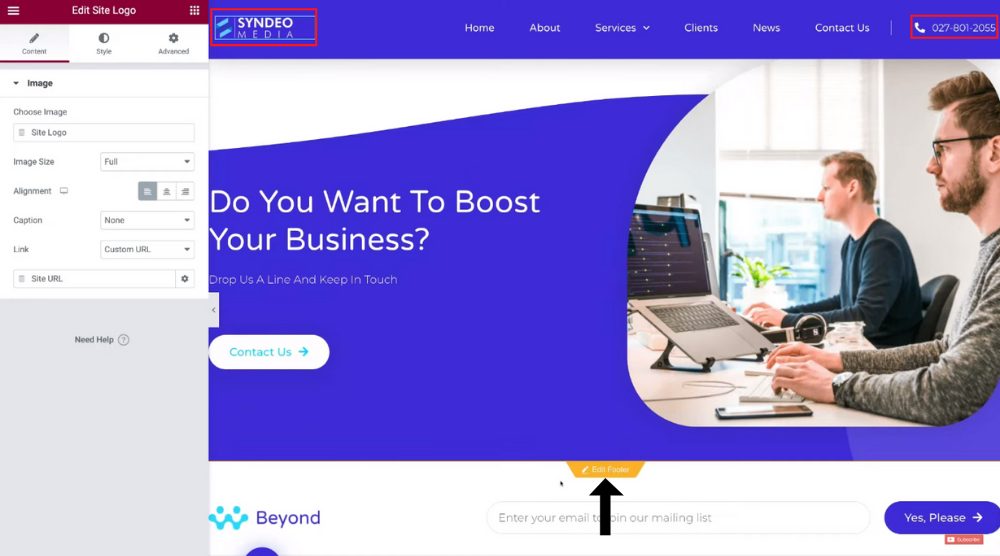
- Click on the logo and replace it with yours. In this method, you’re adding a logo from the frontend rather than the backend like I walked you through earlier.
- Scroll down to the footer and select ‘Edit Footer’ (Refer to the screengrab)
- Change the footer logo to your business logo
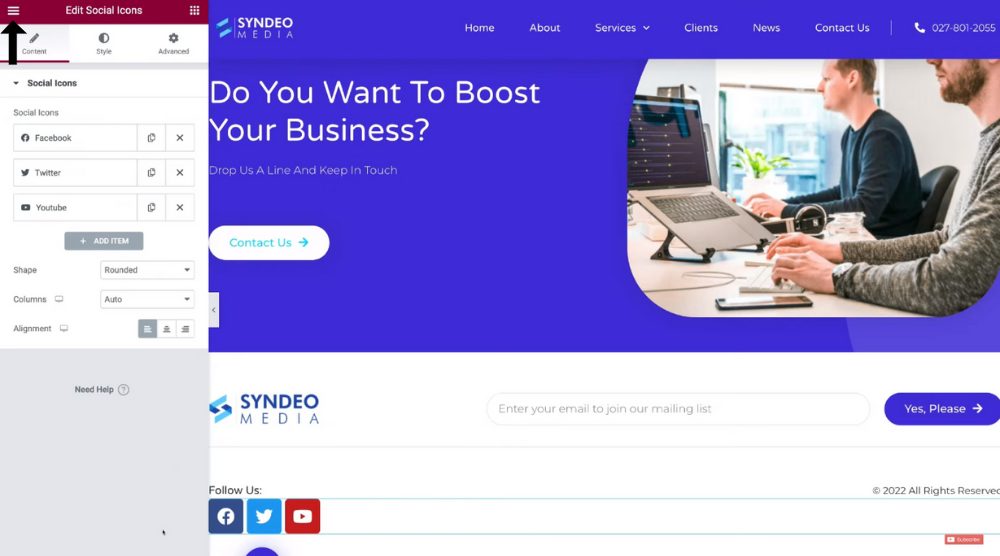
- Navigate over to ‘Follow Us’ and click the pencil icon
- Add social media links on the left.
- Alternatively, you can delete the ‘Follow Us’ element and type in ‘Social’ under ‘Elements’.
- Drag and drop the ‘Social Icons’ element to the footer.
- Add the links to the icons and change the alignment if needed
- Hit ‘Update’
To revisit your WordPress dashboard:
- Click the three horizontal lines (top-left corner)
- Select ‘Exit to Dashboard’
11. Explore the Theme Builder
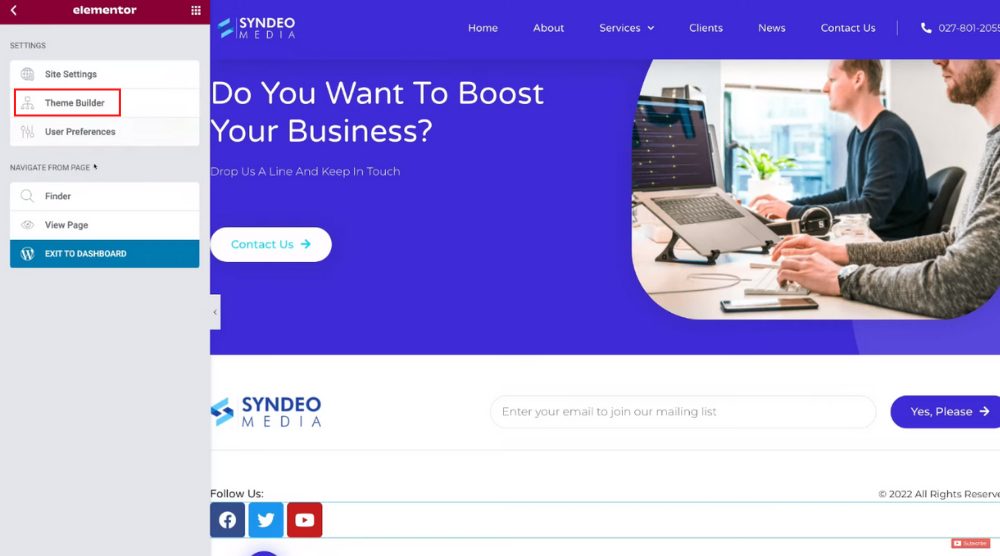
Instead of visiting the dashboard, you can also click on ‘Theme Builder’. This is where you can create a custom header and footer.
To add a custom footer, for instance:
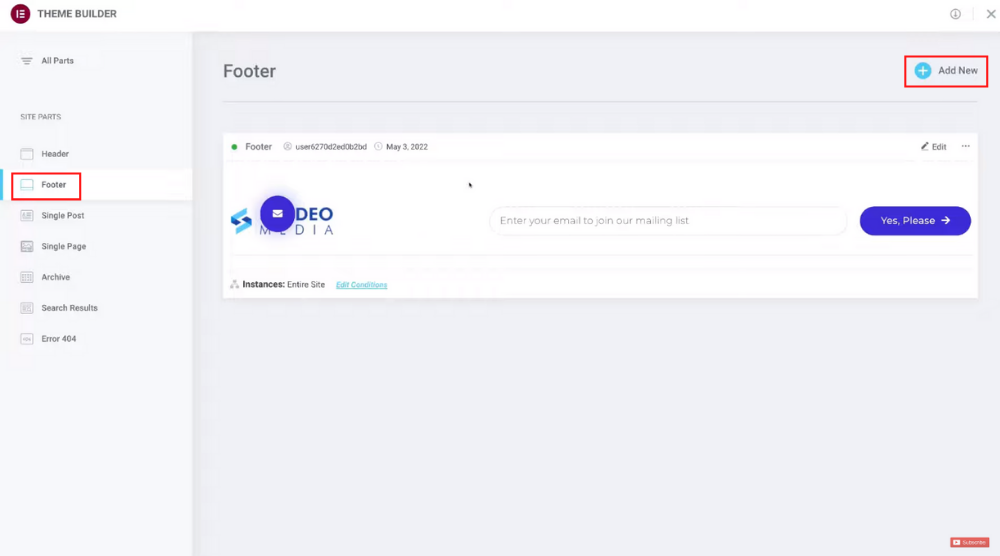
- Select ‘Footer’ from the left-hand menu
- Click on ‘Add New’
- Insert a premade template footer
Back on your WordPress dashboard, you can locate the theme builder from the backend.
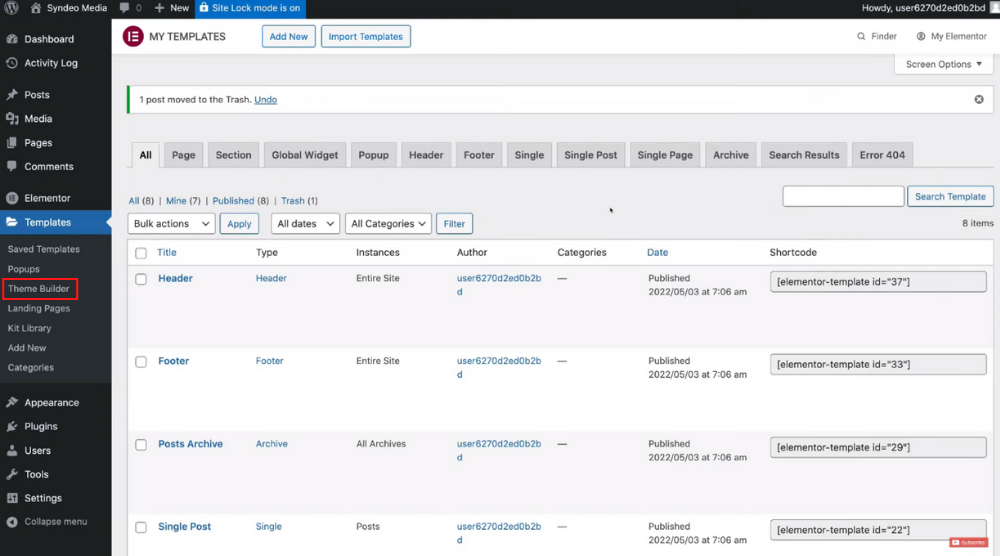
- Select ‘Templates’
- Choose ‘Theme Builder’ from the options
12. Add a New Website Page
Adding a new page is super easy on WordPress.
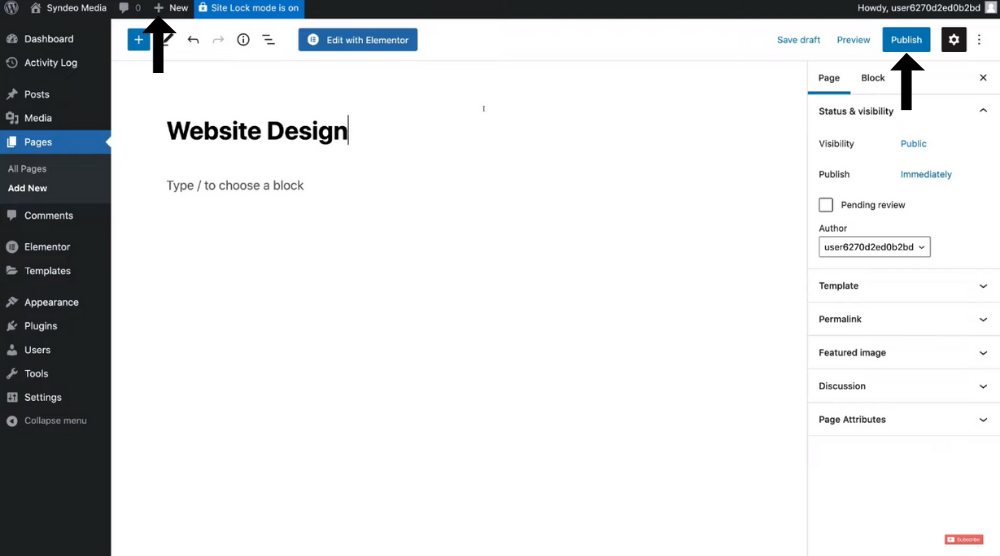
- Click on ‘New’
- Choose ‘Page’ from the drop-down
- Alternatively, select ‘Page’ from the menu and hit ‘Add New’
- Name your new page. We’ll add a service page called Website Design for this WordPress tutorial.
- Hit ‘Publish’
As long as the site lock is active, the website page will not become live.
However, if the site lock is turned off, you can save the website page as a draft and only publish it when it’s ready.
13. Add Page to Menu
With the newly added service page, we now want to add the page so that it appears in your website’s primary menu.
To make that happen:
- Select ‘Appearance’
- Click on ‘Menus’
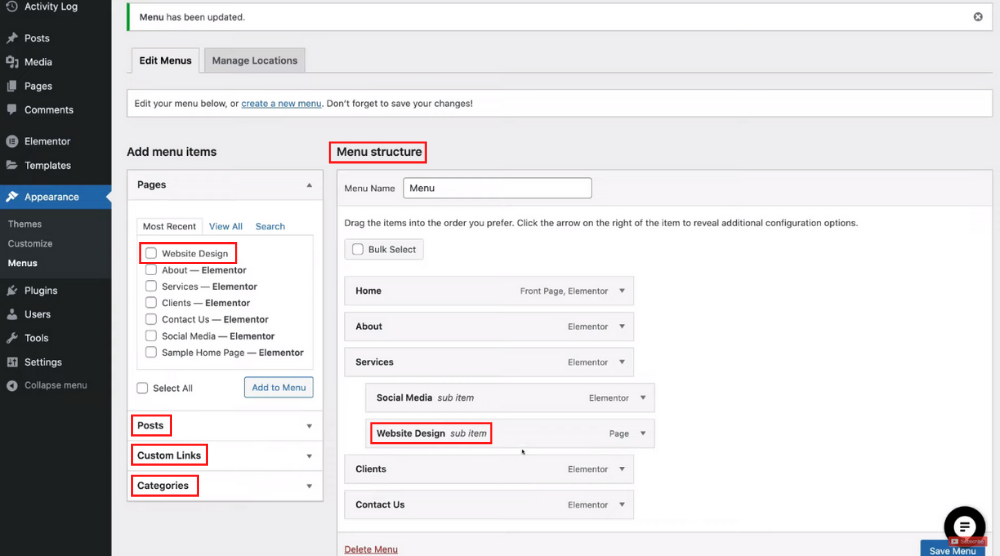
- Under ‘Menu structure’ and next to ‘Menu Name’, ensure that you have the correct menu selected. This is in case you have multiple menus based on the website template you selected.
- Below ‘Pages’ on the left, select ‘Website Design’ (or the new page you’ve created)
- Hit ‘Add to Menu’
- Notice the new page on your primary menu
- Drag and drop to change its position on the menu. It can also be added as a subitem for the Services page (Refer to the screengrab)
- Check out the additional options below ‘Pages’. You can add posts, custom links, and/or categories to the primary menu.
- Hit ‘Save Menu’
Now if you visit your site again, you’ll notice the new subpage on the primary menu.
Also read: Elementor Tutorial for Beginners
14. Customize the New Website Page
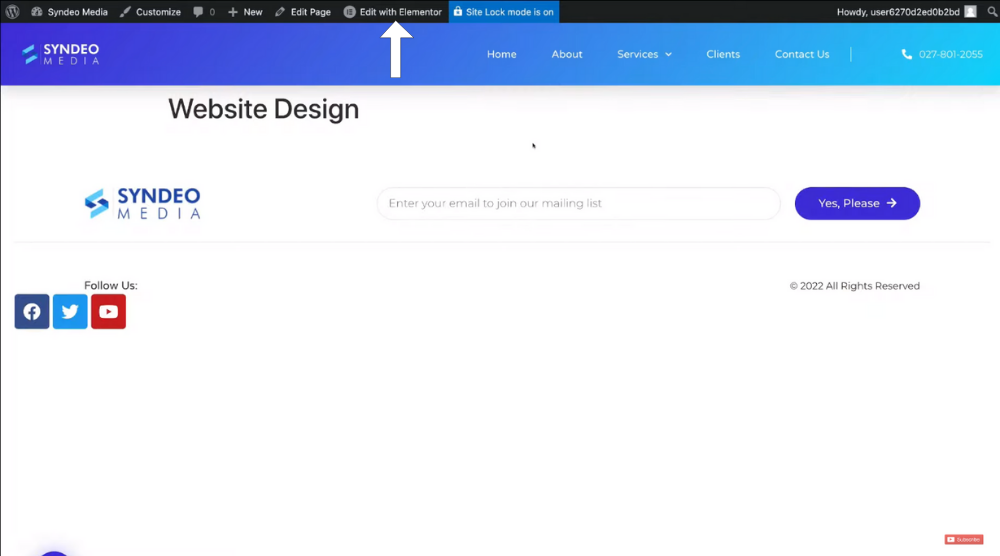
There is no content on the new page right now.
However, we can design a website page from scratch or choose from a pre-made template and then customize that template.
- Click on ‘Edit with Elementor’ at the top
- Build your website page from scratch by adding sections, columns, and elements
- Alternatively, you can hit the file icon(Add Template) and pick multiple blocks and or choose a page template.
Now, head back to your WordPress dashboard.
Also read: How To Make A Small Business Website
15. Publish Your Website (Site Lock)
- Navigate over to ‘Site Lock’
- Select ‘Change this setting’. You’ll arrive at your Elementor Cloud dashboard
- Click on ‘Change this setting’
- Scroll down to ‘Site Lock’
- Turn off the toggle
- Select ‘Unlock Site’
- Click on the site URL at the top
Your website is live!
That wraps up our Elementor Cloud tutorial for 2022.
Also read: Best WordPress Hosting
.png)


Comments
Post a Comment